Baked Eggs, Simple and Delicious

flikr4

I love breakfast foods.  All of them.  Eggs, home fries, French toast, pancakes, cinnamon buns – bring it on.  So one day when I was home sick with a cold, I wanted breakfast, and not cereal-and-milk breakfast but homemade breakfast, preferably with veggies and cheese.  But I was sick, I had a cold and just didn’t have the energy or desire to make myself an entire omelet for breakfast, so I baked an egg.

flikr1

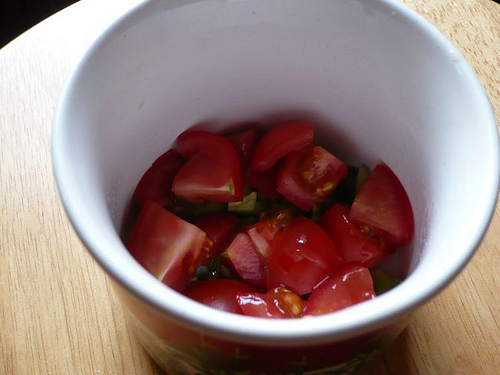
I never realized just how simple baked eggs could be and are.  The most strenuous part of them is some light chopping to get all of the vegetables to a uniform size.  I dug around in the fridge and unearthed some cocktail tomatoes, half a red onion, some red pepper, scallions, sour cream, cheese, and half-and-half I was good to go and eggs were on the menu.  I did as much of a jig as my cold ridden self would allow and proceeded to perform some light chopping, I layered everything in an adorable bake-able mug (seriously, isn’t this Cambell’s soup mug awesome? I’ve had it since I was eight!) and baked it.  Magical.

flikr2

At this point I have made these baked eggs in many different forms but my favorite part of them is that they’re still eggs, so they’re versatile and can be made into a whole meal.  Also this is great for cleaning out those tail-ends of vegetables that have been lingering in the crisper and need to be used up.

flikr3

Kathy’s Baked Eggs
Note: The best part about this recipe is that it is so easy to make for more than one or just one person.  I make it for BF and when I just don’t want to cook, it’s easy and delicious.  I like this a lot with fresh tomatoes but it’s flexible – my recipe below is what I usually add to it, but the important part is to make sure you have a good amount of veggies in the bottom of your mug.

1 12oz bake-able mug or ramekin
1/2-3/4 cup of medium chopped vegetables or meat (I like tomatoes, red peppers, onion/scallions and some ham)
1-2 oz of grated cheese (cheddar is delicious but whatever you have on hand will work; again this is all about cleaning out leftover ingredients)
1 dallop of sour cream or greek yogurt (use whichever you already have/like better; they both work)
Cream, milk, or half and half
1-2eggs (depending on how hungry you are)

Preheat your oven to 350.  Lightly grease the inside of the ramekin or mug you plan on using.  Layer the vegetables in the bottom of the mug (I like onion, pepper, tomato).  Add the cream/milk/half and half until it meets the top edge of the vegetables (this is different depending on the vessel).  Then add the sour cream or yogurt. Gently crack the egg or eggs into the mug/ramekin; careful not to break the yolk.  Sprinkle the egg with a little salt and pepper and then add the grated cheese.  Bake for twenty minutes.  Allow the mug/ramekin to cool slightly before eating it.  Makes a perfect lazy dinner or brunch dish.  Actually I am going to make it right now!  Happy Sunday!

Nesting Spice Cookies

I love gingersnaps.  I love the crackly sugar coating and the way it yields to a cookie that is sharp and spicy.  I love the depth of ginger, molasses, cinnamon, and clove when they get together for a party.  I love the crunchy snap of the cookie as it crumbles onto my tongue. I am obsessed.  So when I saw this King Arthur Flour blog post about nesting cookies, my thoughts went to spice cookies and all I needed was a reason to make them, which was conveniently delivered in the from of a Merchant Marine friend stuck in Florida and another friend nursing a cold in Minnesota.

These gingersnaps are my thought of a perfect cookie and I have never found their equivilent.  These are the same recipe we used in my high school culinary class.  We used to sell cookies around the school every other Friday and there was one teacher who requested a bag of a dozen every time; how could we say no to that?

The snickerdoodles are also divine; I don’t have the passion for them that I have for the gingersnaps but how can you not love a cookie that is rolled in cinnamon sugar?  More crackle!  More soft yielding sugar!  More cookie perfection!  I used Smitten Kitchen’s recipe for snickerdoodles, so you can just go over there and snag it if you want to make these; I totally recommend it. 

These nesting cookies will become your favorite cookie the way they became mine. The instant the pans were cooled, the sharp gingersnap married so well with the neutral snickerdoodle that the whole cookie experience became transcendental.  My sister couldn’t keep her hands off of them!  As I tried them for the first time, I said (to the general apartment), “Frack, I’ve found my favorite cookie and it takes twice as much work as any other cookie!”  I then proceeded to eat two more of them before remembering I was giving them away, hem-hem.

These cookies were visually stunning, with the warm gingersnap color and the bright snickerdoodle.  Now if I could just find a way to foist off more of them on people I know. Anyone need a care package?

Nesting Spice Cookies
Based on an idea I read about on the King Arthur Flour Blog
These Crinkly Molasses Cookies are from my Introduction to Baking book from high school (which still has safety sheets for the Hobart in it. Ah love).
The snickerdoodles are from Smitten Kitchen, I add an additional tsp of cinnamon to the dough when making it as well as dipping the cookies in cinnamon sugar.

The most important thing to note for these cookies is to make sure they are of a consistent size; use the same cookie scoop for both sets of dough (or at least matching scoops).  Also make sure the cookie cutter is metal and sharp (the cookies will be very hot, so plastic will not work so well).

Ellie’s Crinkly Molasses Cookies
Makes about 3 doz large cookies (about 3 inches across) and 6 doz small cookies (about 2 inches across).
1 1/2 cups softened unsalted butter
1 cup sugar
3 eggs
1/2 cup molasses
4 1/2 cups all purpose flour
2 tsp ground cinnamon
1 tsp ground ginger
1 tsp ground cloves
4 tsp baking soda
1/2 cup demrera (raw) sugar (recommended but regular sugar works too)

Preheat the oven to 350 degrees farenheit.  Cream the butter and sugar together with a flat paddle in a stand mixer over med speed or with a hand mixer at medium speed.  Add the eggs and mix to combine.  Add the molasses and mix evenly (my trick:  put a little canola oil in the measuring cup and let it cover the whole inner surface. Then add your molasses. The molasses will slide right out and it won’t be so hard to clean!).  Measure half of the flour, the spices, and baking soda into a sifter and sift them together into the bowl.  Sift the second half of the flour into the bowl.  Mix the dry ingredients in until evenly incorporated, the dough will be a lovely nutty brown.  Put the demrera sugar in a pie plate, allowing it to evenly coat the bottom.  Using a standard cookie scoop (I like 1 1/2 Tbs), scoop the dough out of the bowl into same size balls and drop them into the sugar, coating them completely.  Bake the cookies on a parchment lined baking sheet for 8 mins for smaller cookies, and 12 mins for larger ones.

If you want to make nesting cookies (like mine, sooooo pretty and fun):
Make a second batch of cookies that are a different color, I recommend these ones from Smitten Kitchen.
Cook 2 trays of equal amounts of cookies at the same time (I liked to do 8 on each sheet) and pull them out of the oven about a minute before they are done.  Using a metal cookie cutter, cut your desired shape out of the middle of each type of cookie, swapping centers to create a nested effect.  Return the cookies to the oven for another minute so the centers set.  Delicious.  Send/give them to a friend in need of a pick-me-up they will appreciate it.

Blogger Brunch at Dorado Tacos and Cemitas

I know it’s been almost two weeks since we actually ate this meal, but it was so delicious that I’ve been just reading the recaps (also I didn’t have any of my own photos; all of these are borrowed from other people’s posts, with permission of course).

Photo Courtesy of Brian of http://www.thegringochapin.blogspot.com/

On a bright sunny Sunday after a night of insane thunderstorms, I hitched a ride with the lovely Renee over to Brighton for brunch at Dorado Tacos.  We parked and wandered a little bit, Renee introduced me to Kupel’s Bagels (This establishment really should be much closer to my apartment) and then we headed into Dorado.  We took our seats and then looked at the menu.  A bright little cafe filled with sunshine and energy, I was in love instantly.

Photo Courtesy of Renee of http://www.eatliveblog.com/

I ordered a coffee and doctored it up accordingly (one sugar two creams) and started to drink it.  It was perfect coffee, dark and rich without the charaacteristic bitterness that dark roasted coffees can have; this boded so well for my future meal.  As the rest of the brunchers trickled in I was excited to see Brian, Amanda, Megan, Lara, and Meesh as well as to meet Kimmy and Jacki (if only briefly). 

Photo Courtesy of Renee of http://www.eatliveblog.com/

Once the avengers had assembled, we all collaborated to fight off the bad guys (i.e. eat brunch) and it was PERFECT.  I ordered the Huevos Rancheros with Patatas Bravas and there just isn’t anything better than Patatas Bravas.  Nothing.  They are spicy, crunchy, and all-around spectacularly delicious.  I realize I talked about my love of Patatas Bravas before, but these were better.  These were spicy enough that I couldn’t finish them and needed backup (thanks Brian!), but in a responsible, I’m-sad-these-won’t-be-good-cold kind of way.  And the Huevos – I don’t think there is a better breakfast food.  Queso fresco – yes!  Perfectly fried eggs – yes!  Wonderfully spicy salsa ranchera that kept the whole thing together – absolutely!  Perfect company to chat with – you know it.  I ended up needing an agua fresca to cool down with; my boring Mainer mouth was just not prepared for that spice, but it was by far, one of the best brunches I’ve had in a while.

Now to go back for lunch… or dinner… or both.  Ah the possibilities.  Thanks to Renee, as usual, for organizing this shindig.  A huge thanks to Dorado Tacos for hosting us so well; opening an hour early to accomodate us while having huge grins and good naturedness about everything.  And to the Boston blogger community as a whole – without the awesome community we have here, the oppurtunities for sweet blogger meetups like this would be nil, and that would be very sad.  Now, I think I need a taco.

Dorado Tacos is located at 401 Harvard Street in Brookline and is accessible via Green Line or the 66 bus.

Dorado Tacos & Cemitas on Urbanspoon

French Onion Soup

I love carmelized onions.  I love the smell of them as they cook slowly in my kitchen and permeate my entire apartment with essence of onion.  They are wonderful.  I have been trying on and off for the past couple of years to make French Onion Soup; sometimes with mediocre results, sometimes with decent results, but nothing had that ‘wow’ factor.  That experience of trying French Onion Soup for the first time; something rich, decadent, and smooth, paired perfectly with a good crusty bread and those browned cheese bits that should always crust up the edges of the bowl or crock.  I stumbled across this recipe in the same Cook’s Illustrated: Soups and Stews issue that I found those heavenly drop biscuits.  After such consistent bad/mediocre luck with this soup, I tried this new recipe, thinking at worst I would only waste a few onions; no harm no foul.  It was perfect. Velvety and rich; I could have been back in the Paris cafe where I ate French Onion Soup and watched the square in front of me bustle in the late June evening. It was that good.

This does take some time to make, but most of it involves babysitting the onions while they infuse everything around you with their scent.  I made it on a cold day (actually it was the day before Boston Food Blogs officially launched) and again on our most recent snow day; it was a perfect winter warmer.  I love that I can precook the onions the night before I want the soup cutting my preparation time down to an hour or so the next day.  I also just love to watch that cheese bubble under the broiler. It’s so satisfying to pull out a perfectly browned and bubbly soup to serve a guest (or that boy that does really sweet things for you, like edit your blog posts).

This soup is now a house favorite and given the choice, BF will choose it as the Kathy-cooks-all-day option for dinner (if I am letting him choose something I’m willing to cook all day that is).  Also I think I may have converted my decidedly un-french-onion-soup-loving sister with this little wonder.

Kathy’s French Onion Soup
Adapted from Cook’s Illustrated: Soups and Stews pretty heavily.  I use red wine instead of sherry. Also, I use only chicken stock (more for convenience than any other reason) instead of their recommended beef and chicken combo.

3 Tbs unsalted butter
2 large leeks,washed and sliced into 1/4 inch rounds
4 medium yellow onions, peeled and sliced into 1/4 inche wide half moons
2 medium red onions, peeled and sliced into 1/4 inch wide half moons
8 cups of dark stock, I use a dark chicken stock, but you can use half chicken and half beef if you prefer
1/2 cup red wine
1 1/2 cup water
1-2 springs fresh thyme
Salt and pepper, to taste
4 slices good crusty bread (I’m obsessed with the Russo’s Rustic Artisan loaf, which is a nice ciabatta)
2 cups grated Jarlsburg cheese (You can use something else if you prefer just get full fat content and a softer grate-able cheese)

I just got a mandoline (and it was a super cheap one that isn’t terribly awesome) but it made the whole french onion soup process a lot less tedious, so splurge on yourself and get a mandoline, if nothing else than for onions.  Preheat the oven to 325.  Add the sliced onions to a heavy bottomed not non-stick (this is actually important) pot with the butter. I used my Le Crueset stock pot and it was perfect.

Put the pot full of onions and butter into the oven, covered, and leave it alone for 45 mins or so (if you forget for a few minutes, that’s ok; this step is really forgiving).  Pull the onions out of the oven and give them a quick stir; they should be starting to reduce in volume at this point and become translucent.  Put the pot back in the oven with the cover on a bit of an angle to allow steam to escape.  Leave it alone for another 30 minutes then pull it out and stir again; this time the onions should be starting to turn a nice golden brown. If you think they’re cooking too quickly go ahead and turn the oven down to 300 and if they are still just translucent (no golden color yet) go ahead and punch up the temp on your oven to 350.  Continue to cook and stir your onions in this way until they are a deep brown without actually burning, it takes between 2 1/2 and 3 hrs depending on the oven (Note: If you are pre-baking, let the onions cool and put the carmelized onions in the fridge until you actually want to put the soup together).

Once your onions are carmelized, put them on a medium burner on the stove top and allow them to build up a crust on the bottom of the pan (takes me 5-6 mins of stirring for this to happen without burning).  De-glaze these good crusty bit by adding the wine and scraping at the bits gently with the back of a wooden spoon; they should come right off with the wine.  Cook the wine down and get the brown onion crusty on the pan bottom again. This time de-glaze with water – about 1/2 cup.  Perform the water deglaze another 2 times to really make sure you get the full flavor out of the onions. 
Add the stock and thyme to the deglazed onions and let it come to a simmer over medium-low heat.  Keep this low simmer for 20-30 minutes so that all of the flavors have an oppurtunity to meld.  Taste for salt and flavor; add salt if needed. Remove from the heat.

Toast four slices of your favorite crusty bread.  Ladle the soup evenly into heatproof crooks, lay the toast on top, and sprinkle 1/4 of the cheese over top.  Broil the whole she-bang for 5-7 mins until the cheese is bubbly and crispy brown. Watch it like a hawk; everything burns crazy-fast under the broiler, and burnt cheese is just not as good as browned and bubbly cheese.  Serve it with a spork.  Enjoy it with the rest of that bottle of red wine you opened; by now it should be prefectly aerated 🙂

Simple Lentil Chili

I’ve been posting a lot of heavy recipes recently: breads (like this one and this one), cream soups (like this one), and cookies.  And I know that it doesn’t make those New Year’s Resolutions that everyone is still trying to hold onto any easier, especially now that their shininess has worn off (my New Year’s resolution is to blog more, so far I have maintained my average of one post per week. Resolution fail).  But this recipe should help to get you back on the “healthy eating” bandwagon with its lack of added fat, and if you make it with vegetarian stock, it’s vegan!

I like cold weather because it leaves me with an urge for soups, stews, and chili (so. much. chili.)  which is great, BF loves all of these things – for the most part they fill us up quite well and are inexpensive, not to mention perfect snuggle-up eats.  Winter in New England always makes me wonder what it would be like to be a hermit permanantly; cozying up to my stove for the better part of the day and whiling away my evenings watching tv/playing video games with BF.  Wouldn’t that be the life?  Instead, I work a day job and have to fight icy sidewalks when I walk to and from work every day hoping that today isn’t going to be the day I have to walk to work in a blizzard (which has happened twice so far this winter).  This chili is an ode to staying warm after walking in a snowstorm to get in the door and collapse relieved on the floor in a puddle of snow boots and wet coats.  This is the reason I am excited to go home and eat.

There aren’t any pictures for this post (not from lack of trying mind you).  I’ve made this chili twice in the past two weeks and each time have been so excited about eating it I forgot to take pictures.  So there you go.  It’s kind of unpretty colors anyway, so no loss!  But it’s delicious, hearty and warming without any of that eating-lots-of-butter guilt; also it’s lentils so it’s filling and fast!

Simple Lentil Chili
Adapted (pretty heavily) from the Whole Foods website
Note: The WF version of this soup is vegetarian and wonderfully healthy, but I thought it was pretty bland so I added a bunch of extra spices (see below).  Also, if your stock is not homemade it may be pretty salty already so taste your chili before adding salt.

1 bag brown lentils (the dried ones that are in abundance at the supermarket)
1 onion, chopped medium-fine
1 sweet red pepper, chopped medium fine
3-4 cloves of garlic, minced (more if you like things garlic-y)
2 cans of diced tomatoes (I really like the fire-roasted ones!)
8 cups of broth or stock (I used chicken because I had it on hand, but whatever you have will work well)
2-3 Tbs Chili powder, to taste
1-2 tsp cumin
1-2 tsp worcestershire sauce (optional)
1/2 tsp salt, or more to taste or soy sauce (trust me)

Bring 1 cup of stock or broth to a boil over medium-high heat and add the onions and garlic.  Cook them in the broth until the onions are translucent; about 3 minutes.  Add the red pepper and cook it until tender, another minute or so.  Add the cans of tomatoes, the rest of the broth, and the spices (chili powder, cumin, and worcestershire sauce) and bring the whole pot to a low boil (another 5-7 minutes), stirring occasionally so the vegetables don’t stick.  Once your broth has reached a steady boil, add the lentils, stir to incorporate, and cover the pot.  Turn the heat down to medium low or low and simmer the whole thing, stirring about three times until the lentils are tender and plumped up (20-25 mins).  Try the chili now; if it needs some salt add a couple dashes of soy sauce or 1/4 tsp of salt.  If you need salt allow the soup to simmer for another 5-10 mins for the flavors to merge.  If you didn’t add salt take the chili off the heat.  Serve this chili topped with great gobs of sour cream, a sprinkling of chopped cilantro (if you like it), and some grated cheddar cheese.  It is happy in a bowl.  Real life.  Also, this dish is marvelously low-fat; well, that is, if you use low fat sour cream and cheese (though I never get low fat anything!).