Warm Quinoa Salad

With Boston’s recent spate of July in October I wanted salad for dinner.  Simple right?  But I am forever getting salad ingredients and not using them, so there are frequently no basics, like lettuce, in my house.  Ever.  I’m just not that kind of salad girl.  I’m much more a fan of a nice pasta salad covered in vinaigrette or German potato salad.  But I didn’t want either of those things and the ingredient on everyone’s lips (well blogs) recently has been quinoa.

I get that quinoa is a delicious grain, I even get that it is very helpful, full of nutritional value and makes everything taste wonderfully nutty, but the thing about quinoa is, my mom.  My mom went through a phase when I was younger where she was obsessed with those little curly grains – they were in everything, sautees, soups, salads, even granola (which I now realize was fantastically delicious).  I grew to hate it.  I loathed it on principle the way a sullen teenager will; it’s sort of funny to me now to think about it.  I started to hide the quinoa so she couldn’t use it; I was terrible.  Then I graduated, and she discovered more grains; sesame seeds and flax among them.

It has taken me a long time but I’ve finally come back around to the idea of quinoa in my cooking.  For me it started with this post on quinoa salad from Michelle over at Fun and Fearless in Beantown, and most recently, from this post, by the lovely ladies over at We Are Not Martha.  Both of these salads were cold salads cooked and left to cool before eating, but I wanted mine to be warm. I also wanted it to remind me that it was fall and local fall produce was still kicking around and ripe for use; apples, carrots, winter squash.  I had a plan and I was excited.

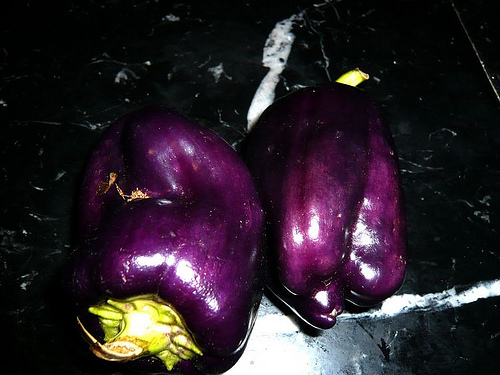
So, on my way home from work on Tuesday, I stopped at the Dewey square farmers market looking for three things: winter squash (Boyfriend actually put the kibosh on the winter squash though; apparently I’ve been making us live on it… which may be a bit true), sweet bell peppers, and onions.  So I wandered a bit in the sunshine and wind, grabbed a bunch of scallions and found PURPLE BELL PEPPERS!  I got two for my salad, thinking that the color would be a lovely addition to the orange carrots and green scallions.  I was set.  I grabbed a train to Alewife and excitedly oggled my farmer’s market purchases.

Warm Quinoa Salad
Note: This is all mine. I wasn’t expecting it to be, but it is; so much a kitchen sink recipe, that it was great and delicious.  This salad can be made vegeatrien by skipping the chicken and cooking your quinoa in vegetable stock or water (I’m pretty sure this is also very good).

1 cup quinoa, uncooked
2 chicken thighs, boned and skinned
2 cups carrots, apples, winter squash, beets (hard roast-able veggies)
2 cups green beans, ends trimmed and blanched
2-3 scallions, the green part only, chopped
3 1/2 cups of water
2-3 cloves garlic, chopped into medium-small pieces
salt and pepper to taste
1/4 cup balsamic vinegar
2 tbs olive oil
Cranberry Wensleydale, chopped (optional but delicious)
Dried cranberries (again, optional but delicious)

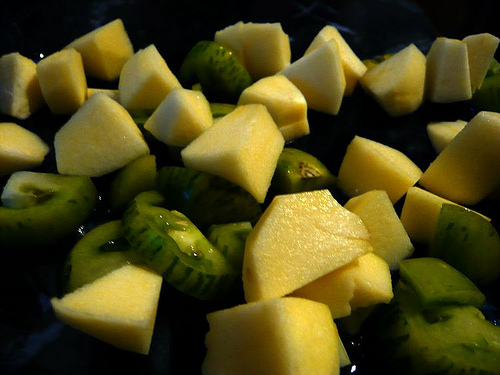
Chop all of your roasting vegetables into 1/2 inch pieces, put them in a lightly greased baking dish and roast at 400  degrees for 30 minutes, or until tender.  Meanwhile, in a medium saucepan, bring the water, chicken thighs, and garlic to a simmer.  Poach the thighs until they are fully cooked.  Reserve the poaching liquid and chop the chicken into chunks; toss it into your main salad bowl.  Blanch your green beans and toss them in with the chicken.  Check the poaching liquid for the chicken – if it is 3 cups you are good to go. If not, bring the liquid up to three cups. Bring this to a boil and add the quinoa, simmer 15 mins over medium heat, and drain.  Add the quinoa to the chicken and green beans.  Pull your vegetables out of the oven; are they done? Good. Add those too, and give the whole thing a good toss.  Add the dried cranberries (if you’re using them) and the scallions.   Let it sit for a minute.  Combine the olive oil and vinegar in a lidded jar and give it a good shake (I’ve actually started to use a milk frother for combining vinaigrettes; it’s awesome).  Toss the whole salad with the vinaigrette dressing and serve while it’s still warm.  Sprinkle the cranberry Wensleydale over the top and serve in big bowls with bread, if you’re into that.  The Wensleydale will melt ever so slightly while you eat, and will add just the right texture consistency to make the whole thing sing. I bet goat cheese could do the same thing.  Let me know if you try it!  Eat the salad while watching a Gossip Girl marathon with girlfriends and being appalled at some of this season’s clothing; seriously, when did the 80’s decide to throw-up on Serena?

Goat Cheese Pizza

flikr2

I love pizza.  It’s always delicious and it’s always in season.   Pizza is one of those foods that I think of when I need comfort food – cheese pizza to be precise.  I know that I posted Deep Dish Pizza here a while ago but this isn’t that – this is classic thin crust eat half of it and feel a little bit sick pizza.  I made this with the intention of not blogging it, so there aren’t too many photos but it doesn’t matter.  It was divine pizza.  Promises.

I made this pizza originally when I (to my great surprise) found goat cheese logs for $5 each at the local markets in Watertown – seriously if you haven’t been to Arax Market on Mt. Auburn St go (now if at all possible, I can wait).  I snagged one and then sat, stumped, trying to figure out what to do with 10 oz of goat cheese.  I could bake it with some swiss and cream but I needed more, I needed to take advantage of the flavor and texture, i needed the tang of goat cheese to hold up on it’s own.  Probably with something sweet to balance it.  And, perfection!  I found pizza dough and a great and simple pizza (possibly closer to the French Flammenkuche) showed up in my kitchen.

flikr3

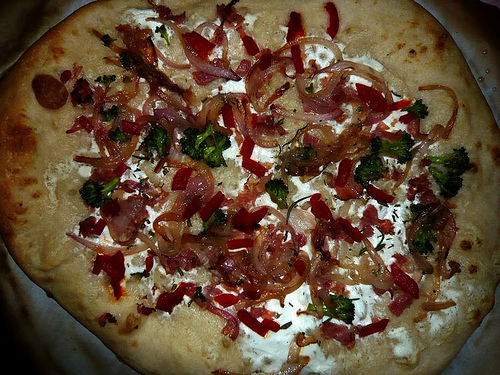
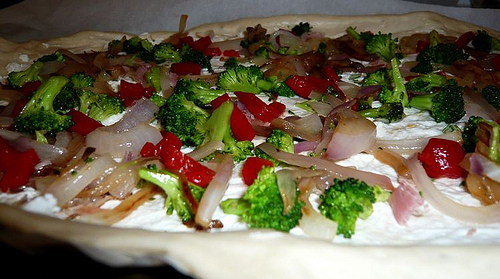
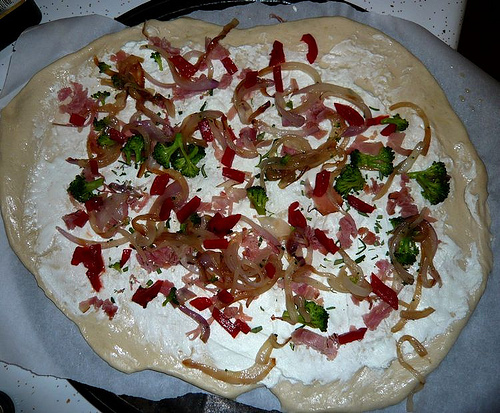
Boyfriend loves his pizzas white, at least when I make them from scratch for him; he loves Olive Oil, Olives, Spinach, Basil, and the occasional sprinkle of sun-dried tomatoes; he’s easy.  But I like a lot of varied things on my pizza and his is typically a tad dry for me – if nothing else I need cheese, because isn’t it just foccaccia bread without cheese?  So here was my idea – use the cheese as a sauce!  With the spread-ability of a slightly warmed goat cheese, I was hooked.  As I rifled through my cupboards and fridge, I came up with one smallish red onion, a little bit of broccoli, a roasted red pepper, and prosciutto.  And there it was.

Ahh, the glory of pizza!  I love to make pizza because I can plan for it and make something decadent, or I can make it on the fly with whatever’s in my kitchen/pantry; just now I was thinking that this would be fantastic with some peaches, added a-la-that-peach-sandwich that Katie over at The Small Boston Kitchen made, or figs, if you’ve got those.  Though I may just go make it for myself with some apples, pancetta, and winter squash; because, well, yum.

flikr1

Goat Cheese Pizza
1 pizza dough, pre-made is fine, but get a ball of dough and stretch it yourself
4 oz goat cheese, warmed slightly
1/2 roasted red pepper, diced to 1 inch pieces
1 small head of broccoli, separated into small florets
1 small red onion, sliced
2-3 slices prosciutto, chopped into 1 inch pieces
Olive Oil
Salt and Pepper to taste

Preheat your oven to 425 degrees Fahrenheit, preferably with a pizza stone inside it.  Heat olive oil in a medium pan and sauté the onion until soft, about 1-2 mins over med heat.  Add the broccoli and continue to toss/move the vegetables every 15-30 seconds until the broccoli is wilted and the onions are transparent (3-5 mins).  Remove this pan from the heat. stretch the pizza dough so it’s the size of the pizza stone/the thickness you want.  Spread the goat cheese over the body of the pizza as you would tomato sauce, though a little more gently is wise here since the dough could rip!  Sprinkle your now-cooled broccoli and onions over the goat cheese, and add the roasted pepper and prosciutto.  Bake in the hot oven for 10-15 mins, until the crust is an even brown on the bottom and the top is starting to brown.  Remove from the oven and let it cool for 5-10 mins.  Enjoy with a nice white wine and strawberry, fennel, and spinach salad.  Eat it feeling less guilty than you usually do about pizza, because the cheese isn’t greasy at all!

Grilled Cheese and Tomato Soup for the Big Kids

I love the fall.   I love the cold and the wonderful excuse it makes for me to crank the oven up and bake, or the way that cold also makes me think of nothing but soup for endless days.  So, naturally this is something for both of those fall loves, baking and soup – because what’s a good soup without something warm and bready to dip into it?  These pretzels started as an idea – germinating in the recesses of my brain as away to make yeast bread and maintain the deliciousness that is a fresh soft pretzel.  I have made them time and again since they first showed up in the issue of Bon Appetit where I found them.  And the soup – the soup is a symphony of tomato – it was the perfect late fall soup, especially with the plentiful amount of late summer tomatoes on the farmer’s market recently.

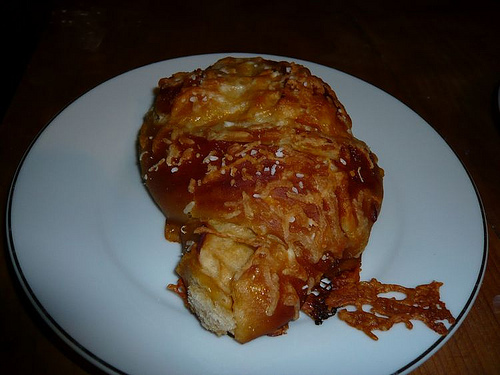
When childhood memories come up for me I usually see some sort of florescent mac and cheese or the time when I was 6 and made my mom Spaghetti-O’s for dinner, so the whole grilled cheese and tomato soup thing is just not something I ever ate as lunch on a cold fall Saturday.  But here I was – friday night, clean kitchen, and tomato soup and grilled cheese were on my mind, so I morphed it.  I created my favorite pretzels but riffed them with some cheap grated cheese stuffed in and roasted tomato soup – a little more decadent than Campbell’s but damn, that was divine.  And while I am not usually a fan dipping my pretzels in anything but mustard, they were perfect in their cheese-filled goodness as something to dip in this soup.

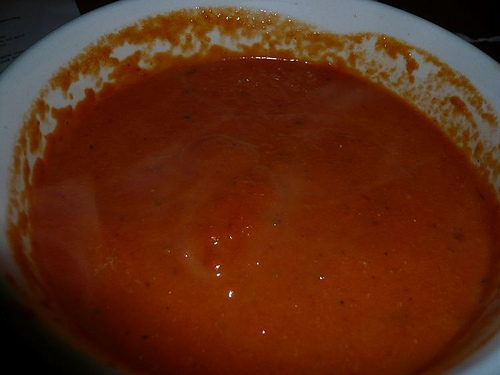
I know I already talked about my love of soft-pretzels recently, but is there anything better, seriously?  With their rich dark crust and that heady soft interior – it’s one of my favorite taste and texture combinations. And these ones are great because they are a little bit sweeter and darker than the average bear – something to do with brown sugar, and let’s face it brown sugar makes everything so-much-better.  The tomato soup was a really wonderful set of flavors – dark, with the roasted flavor, but still so light as to marry brilliantly with this pretzel.

>

I won’t tell you that pretzels are an easy feat; they’re not – you need patience to make pretzels with the two risings and the par boiling in beer/baking soda/brown sugar but it’s totally worth it.  So here you go – take the time to make these – you won’t regret it or feel like your Saturday was wasted.  I promise.


Cheese Stuffed Pretzels and Roasted Tomato Soup
Note: These are superb together but don’t be afraid to make them separately.  Also I’ve recently been thinking that the pretzels would be great with some sort of cream cheese filling.  If you try it, let me know how it goes!

Roasted Tomato Soup
8 large tomatoes, cut into eighths (about 4 lbs)
salt and pepper
olive oil
2 cloves garlic, minced
1 small onion quartered
1/2 tsp rosemary
1 tsp thyme

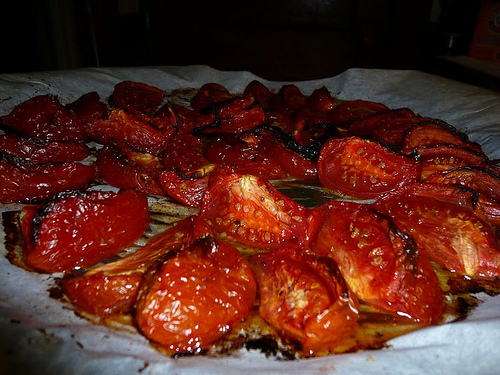
Line tomatoes and onion on a large parchment paper lined baking sheet (cut side up) and drizzle with olive oil, then sprinkle with salt and pepper.  Bake at 350 degrees for 30-45 minutes, until the tomatoes have started to caramelize.  Remove from the oven and let cool for 20 minutes.  In a large pot, add a little more olive oil and sauté the garlic over med heat for 2-3 mins.  Add the thyme and rosemary, and saute for another 30 secs or so.  Add the roasted tomatoes and onion to the garlic and herb oil and stir it all together.  Let the whole thing come to a simmer and, using an immersion blender, pulp it all together until it is smooth and even.  If you don’t have an immersion blender, just let the soup cool and blend it in batches in either a blender or food processor. Serve warm, garnished with some fresh basil and grilled cheese (or cheese stuffed pretzels) on the side.

Cheese-Stuffed Pretzels
Adapted, fairly closely, from a recipe in Bon Apetit, March 2009
Dough
1/2 cup warm water (you should be able to hold a finger in it for about 5 secs and it should feel warm)
1 1/4 tsp active dry yeast
1/4 cup buttermilk
2 Tbsp packed dark brown sugar
3/4 tsp sugar
1 1/2 tsp vegetable oil
2 cups flour, if you have bread flour go ahead but All purpose is just fine
1 1/2 tsp salt, I used kosher
Oil, for the bowl and rising dough
2 Oz shredded cheese (cheddar is better, next time I’ll probably use fresh, grated, extra sharp cheddar)

Mix the yeast into the hot water and let it rest for about 5 minutes, until bubbles start to form and you get a nice “yeasty” (that’s a very technical term there, you see?) smell.  Add your buttermilk and both sugars to the yeast mixture, mix well.  In a large bowl, mix flour and salt together with a wooden spoon.  Create a well in the dry ingredients and pour in the yeast mixture gently. Stir this in until fully combined (this is sometimes a little bit sticky).  Oil the bottom and sides of a clean bowl and scrape your dough mixture into the bowl. Drizzle some oil on top of the dough, cover the bowl with plastic wrap, and put it in the refrigerator to rise; about an hour, until it’s puffy and about half again as much.

Poaching Liquid
1/4 cup amber beer (I used Shipyard Pumpkinhead but any amber would do – something like Magic Hat No. 9 is good)
1/4 cup baking soda
1/4 cup packed dark brown sugar
3 Tbs vegetable oil
1-2 Tbs pretzel salt (for sprinkling post-poach)
Water to make the liquid 2 inches deep. Depending on the pot, this varies – the less water you need, the more flavorful your crust, but don’t skip it!

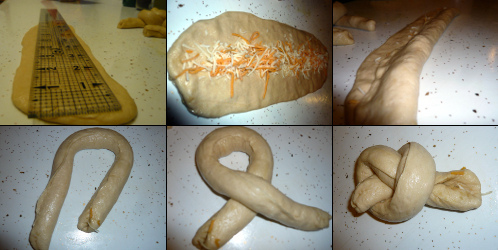
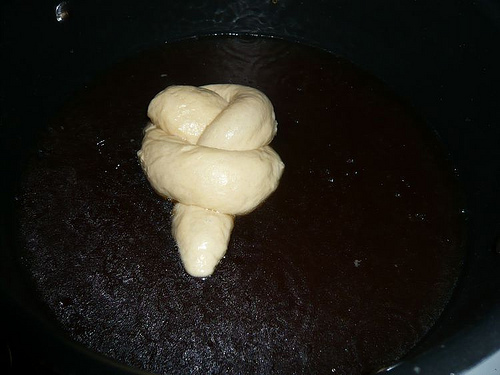
Preheat the oven to 450 degrees.  Bring the beer, water, baking soda, dark brown sugar, and vegetable oil to a simmer in a reasonably large wide pot – I use a soup pot which is great, but a dutch oven, if you have one, is a solid option here too.  Remove the risen pretzels from the fridge and prepare to poach!  I find it easiest to poach these knots using a slotted spoon and poaching one pretzel at a time.  Place one pretzel gently in the bowl of the spoon and lower it into the liquid.  Let it poach on each side for 30-45 seconds and then place it on a parchment lined baking sheet.  Do this for all eight pretzels.  Sprinkle cheese stuffed pretzels with more of the cheese filling, and regular pretzels with coarse or pretzel salt.  Put them immediately in the oven!  These can’t dawdle around on the counter while the oven preheats, the poaching liquid will seep in and cause the salt to melt resulting in a gummy pretzel (this is bad)!  Bake the pretzels for 12-15 minutes in the middle of your oven, if your oven heats unevenly make sure you rotate the baking sheet or some of the bottoms will be burnt.  Let the pretzels cool for 10 minutes (if you can) and enjoy.  These are particularly good the next day!

Jacob Wirth, for beer and decent German Food

On Tuesday night, in the rain and mist, one of my friends asked me if I was up for dinner at Jacob Wirth.  I Googled it, perused the menu and said yes (she had also gotten the Groupon earlier in the week).  So we left in the cold rain and walked from our Post Office Square office, to Jacob Wirth’s location in the theatre district.

Ridiculously high ceilings, with lights strung back and forth across, made this reminiscent of the good brauhaus that Boyfriend and I went to three times during our four days in Munich (we couldn’t help ourselves there that food was fantastic).  I was immediately wistful for a good German ale – and they had it!  With an extensive beer menu (it took up well over two pages, and about eight inches of that were German/Belgain imports; BLISS!) and a quick scan, I found Hofbrau (yahoo), Fransiskaner (yippee), and many others that I had tried previously while in the land of beer.  I danced a little happy dance in my head while I decided which beer I wanted; at $7/beer, these were not cheap pints!  The friend I was with was not the biggest of beer fans, so I ordered two of the fruitier beers off the menu, a Hoegaarten and the Fransiskaner (which I knew was delicious) and let her choose which one she wanted.

After (finally) making a beer selection, we looked at the food menu, ordering the house pretzels as an appetizer and both of us ordering the smoked, grilled bratwurst for a main course. Unfortunately, the pretzels were a tad dry and needed extra mustard – they gave us some homemade honey mustard that was more honey than mustard, so I modified it with a hefty squirt of Gulden’s to balance the flavor. Pretzels set, we proceeded to eat half of the basket in about 5 mins (also why aren’t pretzels the table bread of choice in a German restaurant?  They gave out cornbread to start the meal).  Washing it all down with our delicious beer, the Hoegaarten is good but watery, so keep that in mind if you order it.

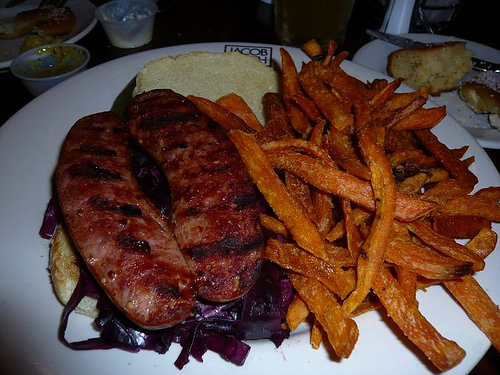
Our entrees came out to much more pleased silent applause; perfect grill marks on the brats and a giant mound of sweet potato fries for my side.  The Bratwurst perfectly cooked with just the right air of smokiness to give them a wonderful depth of flavor, mixed with the house cured red-cabbage; they were wonderful.  The sweet potato fries were fine too, though I think next time I would go for the German Potato Salad.

Overall, my trip to Jacob Wirth’s was a lot of fun – I left wanting to sing a good German drinking song.  And I can’t gush enough about the Beer Menu, but next time I’ll skip the pretzels.

Jacob Wirth on Urbanspoon

Ratatouille, My way

I love Ratatouille and I feel like I have been making it for years, and I guess in a way I have.  I started by making a Greek Caponata one night because in the three months of college that I sprung to get myself cable I watched way too much of the Food Network and Giada made it.  The greek caponata was good in that it had enough flavor but it always made way more than Boyfriend and I could ever eat in a single sitting and the leftovers usually went bad, also it had potatoes in it and boyfriend is not the biggest fan of potatoes.  So I modified the recipe that Giada had made, I chucked the potatoes and I halved the eggplant (you can’t even find eggplant that’s fresh in Maine so there is very little point in trying) I kept the zucchini at it’s full amount and stuck with a full red onion but switched to a can of diced tomatoes instead of fresh.  This was a great way to eat the caponata but it wasn’t exactly what I wanted, so I sort of gave up on it as a meal.

I graduated from college and moved to Boston, land of the locavore and the farmer’s market.  What a beautiful thing the farmer’s market is – everything is so accessible it’s a T-stop or a short bus ride away and you have bags of fresh veggies on the cheap and they actually *gasp* seem to be fresh.  While not exactly unfamiliar with the idea of fresh fruits and vegetables (fresh from a farmer) I hadn’t seen a lot of fresh vegetables that I could pick up from a bin that I didn’t harvest and weed myself.  Growing up we had a huge vegetable garden and that was my summer job, the weeding and care were among my numerous responsibilities over the summer months, from planting in the pouring rain to harvesting rutabagas well into the darkness on the night that they called for the dreaded “first-frost.”  I lived in that garden.  sneaking peas before they were ripe and claiming the first cherry tomato as mine.  I loved it and I loved the fresh veg that came from it more.

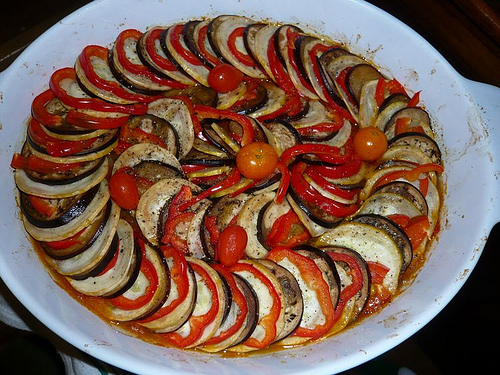
So here I am now in my mid-twenties and just finding fresh vegetables again after years if missing out – did you know you can get fresh eggplant for 3/$1 if you talk to the right farmer?  or that 2nd run tomatoes make a delicious and easy tomato soup, not to mention cheap?  So here I was, second run tomatoes, red pepper, eggplant, and zucchini in hand and panicking for ways to use them before Boyfriend reprimanded me for food waste, when from the dregs of my memory I saw a bowl full of big unwieldy chunks being tossed by hand in my tiny college kitchen and I had a plan.  I didn’t want the chunks but the more dainty looking ratatouille that I saw in the movie of the same name, something elegant and layered that made the eater wish for more if only to gaze at the beauty of it.  The first time I layered the whole thing like a lasagne in large flat sections that worked their way up the oval shaped baking dish Boyfriend had let me get at our first (and terrifying) trip to Ikea.  This was great in principal and looked stunning but it was a) a total nuisance to cut and b) way more food tahn two people need at any given time.  So I adjusted and came up with this!

Ratatouille, My Way
Note: Yes I know it does look like the Ratatouille from that movie with a rat (I like that it’s pretty) but it can be cubed up and baked for a more homely feel.

Ingredients:
1 Medium sized onion chopped to a coarse dice (1/2″ pieces is fine)
2 Cloves fresh garlic, pressed or minced
2-3 Medium sized fresh tomatoes, coarsely chopped (the fresher the better, I liked the heirlooms in mine)
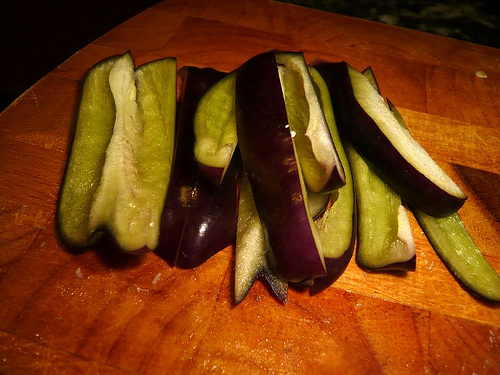
1 Medium Size eggplant, or 2 small (make sure they’re fresh or they’ll be bitter)
1 Medium sized zucchini, yellow or green is up to you
1 Sweet Red Pepper
2-3 Tbs Olive oil, plus more for the pan
Salt and Pepper to taste
2 Fresh Thyme Sprigs

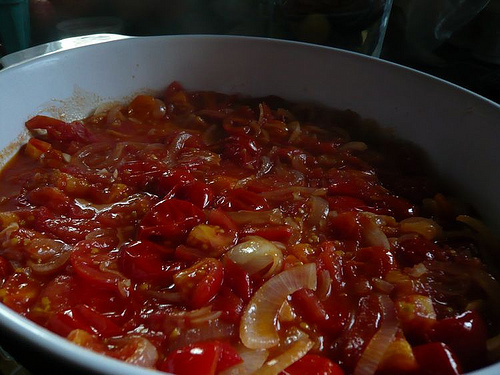
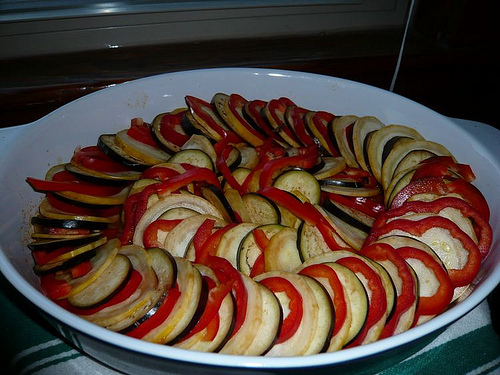
Heat the Olive Oil in a medium sized skillet and add the garlic and onion.  Saute the garlic and onion until the onion is slightly translucent (about 5 minutes) over medium heat.  Toss in the tomatoes and turn the heat down to low, med-low and cover, stirring occassionally for about 10 mins.  Drizzle Olive Oil in the bottom of a bakable dish (I do sincerely like my Ikea stoneware, it was cheap and seems durable enough for a girl on a budget) and make sure it has a light coating (this is flavor too so use a good Extra Virgin Olive Oil).  Add your sauteed tomatoes, garlic, onion mix to the dish and spread it evenly over the bottom.  If you have cubed your vegetables (eggplant, zucchini, and red pepper) put them all in a large bowl and gently toss them by hand with 1 Tbs of Olive oil and salt and pepper, if you’re feeling adventurous a little balsamic vinegar is also a nice touch.  If you want your Ratatouille to look like mine cut your vegetables into 1/4″ thick rounds and stack them alternately around the pan in a circle until you reach the center (this is best in a circular or oval dish), drizzle Olive Oil over these veggies and top with Salt and Pepper to taste.  With both versions add a couple of fresh sprigs of thyme to the top and cut a form fitting piece of parchment to cover the whole dish.  Cover and bake it for 45 Minutes, until the veggies are tender and your entire apartment smells of tomato and zucchini, I’m on a late summer veg kick what can I say!  I suggest using this time to pour yourself a glass of wine and relaxing, preferably with a good book, Heirloom by Tim Stark is quite good.

Serve this with a nice salad, with sweeter greens – baby spinach or romaine!  YUM!!! Ratatouille, it’s homey and makes me feel good!