Baking Cookies for Swapping

flikr2

A note for all of you with those good health conscious January resolutions.  I’m sorry.  I try to avoid those resolutions.  There’s something about butter and sugar that makes my life need more of them.  And these practically perfect cookies won’t really help you stick to those resolutions at all.  But they are delicious and so rich you can’t really eat more than one or two of either.  ðŸ™‚

flikr1

I hosted a cookie swap in mid-December and in a terribly haphazard way forgot to put these recipes up for the greater blog-reading world (all of you fantastic readers) to make for yourselves… until now.  These are both truly delicious cookies – decadent in all the right ways.  But I’m a fan of chocolate, so I’m probably a little biased.  Also BF goes over the moon every time I make these macaroons, to the point where he has started to learn the recipe so he can make them for himself when I’m not around.  Love it!

flikr3

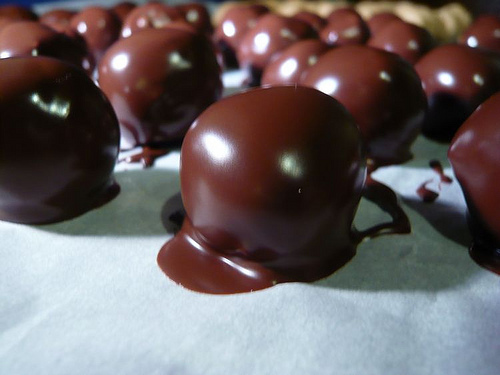
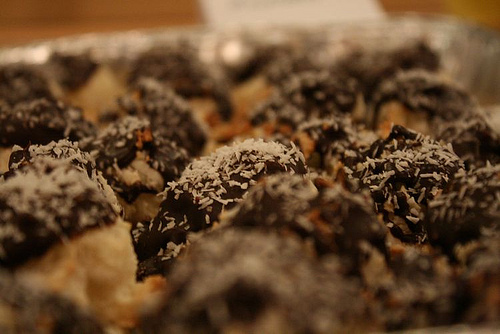
Mountain Top Coconut Macaroons
I have no idea where this recipe came from but it’s awesome.  I dipped it in chocolate and it was better.

4 large egg whites
1 cup white sugar
dash of salt
3 cups shredded coconut (I try to use a mixture of half finely shredded and half coarse, but use what you’ve got on hand)
1/2 cup flour (I used cake flour because I had it but all-purpose is fine)
1 tsp vanilla
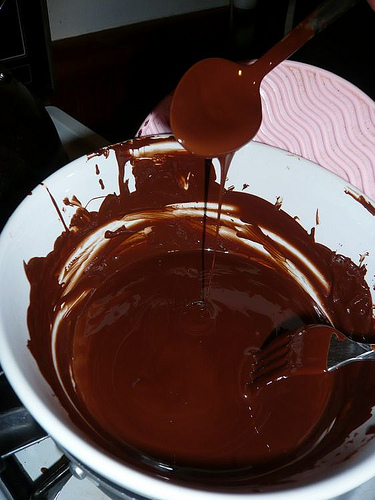
1/2-1 semi-sweet chocolate, melted
Finely shredded coconut, for sprinkling

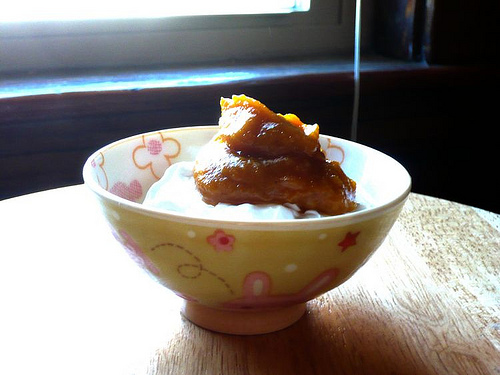
In a stainless steel bowl over a pot of simmering water (or a double boiler if you’re fancy like that), whisk together the egg whites, sugar and salt until they are warm to the touch and frothy/creamy. The sugar will be fully melted and everything should be a uniform white color.  Remove from the heat.  Add the vanilla, flour, and coconut and stir to combine; it will be sticky.  Cover with plastic wrap and stick it in the fridge for an hour or two until the mixture is firm.

Once your cookie dough is firm, preheat the oven to 325 degrees Fahrenheit and line two baking sheets with parchment.  These cookies are a little sticky and parchment can do double duty here to hold the cookies after they have been dipped in chocolate, so I strongly suggest that you use it.

Using a small cookie scoop (about 1 Tbs) scoop the cookies onto the parchment. They don’t really expand, so they only need 1″-1 1/4″  between the cookies; enough so that if they do spread they aren’t stuck together.  Bake them for 10-15 mins, until the tops are golden brown.

Allow the baked cookies to cool for about 15 mins so that they are cool to the touch and then dip the tops in the melted semi-sweet chocolate.  Immediately sprinkle a few shreds of coconut on top of the chocolate and let them harden (20-30 mins).  ENJOY!

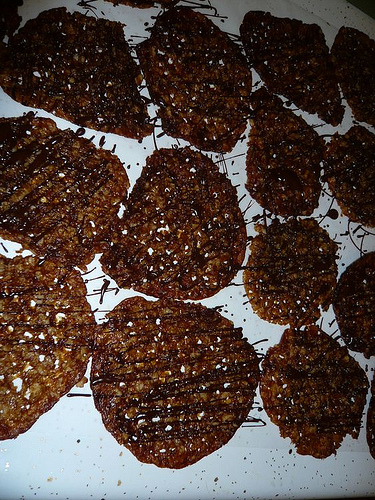
Jackson Pollock Lace Florentines
Adapted from The Fannie Merritt Farmer Boston Cooking School Cookbook, circa 1959 (best one!)
My favorite part of these cookies is getting all Jackson Pollock with the chocolate.  Spatter painting – it’s for more than just canvas.

2 1/4 cups oatmeal, I use old fashioned oats and give them a pulse in my food processor
2 1/4 cup dark brown sugar (Fannie calls for light but I prefer the deep caramel tones of the dark)
3 Tbs flour (I think you could safely add oat or another kind of flour here; its mostly so the sugar has something to hold it together)
1 tsp salt
1 cup melted butter
1 egg, slightly beaten
1 tsp vanilla
1/2 cup melted semi-sweet chocolate

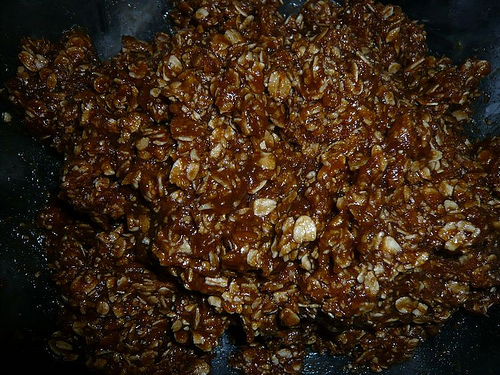
Preheat the oven to 375 degrees Fahrenheit. In a large bowl, mix the brown sugar, oatmeal, salt, and flour together until evenly combined.  Add the butter and stir to coat everything.   Stir in the egg and vanilla.  Drop in teaspoonfuls onto a parchment lined baking sheet at least two inches apart, these spread (a lot) so don’t be stingy with space.  Bake until lightly browned, about 7 mins.  Allow the cookies to cool slightly on the baking sheet then move them to rack once they have set.  Be careful, these cookies will burn you directly from the oven, complements of molten sugar.

Once the cookies are cool to the touch, crowd them onto a wide flat surface and go all Jackson Pollock on them with the melted chocolate; leave swirls (if you like fancy) or spatter paint them!  It’s up to you!  Have fun!  I love this part.

Eat them delicately. They will crumble and be luscious.  They will melt in your mouth the way a good piece of caramel should, but they’ll make you feel a little bit okay about it.  After all, they are oatmeal cookies, right?

Bangin’ Blueberry Pesto Chocolate Cupcakes

flikr3

At the beginning of December Local in Season tweeted about Pestos with Panache holding a recipe contest and I was intrigued.  I quickly investigated and emailed /tweeted Lauren, the owner of the company, saying I would love to participate.  She replied quickly and offered to send me a pesto of my choice for my recipe.  I was delighted.  Many of my blogger friends have been using the Pestos with Panache in their cooking recently and I had been dying to try it.  Lauren shipped it out and I waited patiently for my Pesto to arrive.  I chose the blueberry pesto, something I have a bit of an obsession with given my upbringing in blueberry fields, and while Lauren checked in with me everyday to see if I’d gotten my pesto, I started to get excited.  What was I going to make with this pesto, something savory or sweet?  Something classic, like a pesto cream sauce, or something brash and outlandish?  I chose outlandish. 

flikr1

Maybe it was the blueberry balsamic vinegar sitting in my pantry calling out for usage, maybe it was me falling in love with these litte vegan (without the pesto) gems in October, maybe it was that first whiff of pesto as I unpacked it moments before I left to host the Boston Blogger Cookie Swap and I thought of chocolate and blueberry layered and married together, but I like to think it was all of these things at the same time.  Blueberry is one of those flavors that makes me five again, running through a hot field to my mom and being reprimanded for wrecking the berries.  I love the memories that I get from the blueberry flavor and the spiciness makes these worthy of mention.  So here it is – my spin on an accidentally found (and promptly inhaled with non-vegan frosting) vegan chocolate cupcake.

flikr2

Kathy’s Bangin’ Blueberry Pesto Chocolate Cupcakes with Cream Cheese Frosting
Note: These are adapted from a food.com recipe that I found. They are also the most wonderfully moist cupcakes I’ve ever eaten and so fast to make. It’s a dream.

Cupcake Ingredients
1 1/2 cup all-purpose flour
1 cup granulated sugar
1 tsp baking soda
1/3 cup cocoa powder
1/2 cup oil (something with a neutral flavor, I use vegetable but any without a strong flavor will work)
1 cup water
1 Tbs balsamic vinegar (I use the Blueberry Balsamic from La Roux kitchens, thanks Sarah!)
2 Tbs Bangin’ Blueberry Pesto, from Pestos with Panache

Preheat the oven to 350 degrees farenheit. Add all of the dry ingredients to a medium sized bowl and mix them until the cocoa is distributed evenly. In a two cup measure, combine the water, oil, vinegar and pesto. Stir until the pesto is broken up and even (it’ll look a little like a vinaigrette). Add the liquid to the dry ingredients and mix until everything is evenly mixed and smooth; 20 or so stirs by hand is good. You should be able to hear the vinegar and baking soda sizzle a little bit. Separate the cupcake batter evenly into a 12 cup cupcake pan; I used some super adorable silicone bug cupcake liners I got for Christmas (Thanks Mandi!), and bake for 15 to 20 minutes (about one short chapter in Harry Potter, if you read like me); they’ll bounce back to the touch or an inserted toothpick will come out clean when they’re fully cooked.

Cream Cheese Frosting Ingredients
1 8oz block of cream cheese, softened
6 Tbs unsalted butter, softened
1/2 tsp salt
2-3 cups powdered sugar

Mix the butter and cream cheese until fully combined and fluffy. Add the salt and stir to incorporate. Add 1 cup of powdered sugar and stir to fully combined. Gradually 1/4 – 1/2 cup at a time, continually adding powdered sugar until the frosting is the consistency and taste that you desire (I don’t like my frosting terribly sweet so I usually err on the less sugar side of things). Smear large dallops of frosting on your chosen receptacle, spoon, cupcake, spoon, spork, pancake, spoon, fork… (Umm, yeah – Hi my name is Kathy and I have a cream cheese frosting addiction). Eat it messily. Maybe like BF[Editor’s Note: The young unshaven gentleman in question was so enamored by the delicious cupcake, that he attempted to eat it in a single, high-velocity bite.]

Christmas Traditions and Peanut Butter Balls

Peanut Butter Ball

I know it’s almost Christmas when I am checking the weather every hour hoping for snow and I start the annual plea for a Christmas tree with BF.  Fall has officially gone the way of the dodo bird for this year and the blustery streets of the financial district are making me wish for those hot humid days of this past summer. 

Christmas is also a good excuse to cook, and I cook everything, well it feels like it.  Growing up we used to have what was called a “dipping party” at a friend’s house.  There was a big group of local women who hand made, rolled, and dipped roughly 1500 chocolates to give away for the holidays.  My mom, my sister and I always went – I hung out with friends and avoided the dipping of chocolates, my sister was meticulous, and all of the adults laughed alot and drank a bit.  It was always a lovely evening this one night that really set Christmas off, it was usually the last day of school before the holidays and all of us kids were far too rambunctious so we were bundled and sent outside to play in the snow, it was delightful and almost always ended in tears (mine, mostly). 

Dough

But I still remember the chocolates, I remember coming back inside tearstreaked and cold to the warmth of the kitchen and the smell of melted semi sweet chocolate and paraffin wax and knowing that everything would be alright.  I would then grab a freshly dipped candy with chocolate still melty and pop it in my mouth before a parent saw, they always did.  Those chocolates were the best too- Peanut Butter balls, Needhams, Rum Balls, peppermint patties, they were Christmas in a coat of chocolate.  As I licked the melted chocolate off my fingers I always grabbed an undipped candy and went back outside; renewed and fortified to be picked on by my older sister and her friends.

Tempered

These Peanut Butter balls are Christmas to me in the way very few things are.  With one bite of these little gems I feel like I’m in a time warp and I’m 11 again, the youngest of five kids trying to all fit on one long tobaggan and falling off because I was made to sit on the back.  We weren’t really a family of holiday tradtions, sure we put up a christmas tree and trimmed it; me demanding that my ornament (this really terrible thing covered in pink and opalescent netting) be on the highest branch it could be.  But this candy is what makes it for me.  The smooth Peanut Butter center, if you make it with crunchy peanut butter it isn’t christmas – it’s just candy, enrobed in the rich semi-sweet chocolate.  But it’s not just the flavor and texture of the candy it’s the process, watching Christmas movies and rolling Peanut butter balls or dipping the chocolates and leaving drops on the kitchen floor.  It’s messy and it’s totally wonderful.

Waiting to harden

Peanut Butter Balls
Note: When I made these I was actually short about 3/4 of a cup of Peanut Butter so I subbed in some Hazelnut Cream (like Nutella but no chocolate)  and they are fantastic.  I also went a little bit lighter on the Conf sugar (I said it was for sweetness but more accurately they were dry and sweet enough already).
This recipe halves very easily so have at it (pun intentional).  Otherwise plan to give these away as gifts, makes about 10 doz.

1 Cup (2 sticks) soft butter, (very soft butter like you can whip it into delicious peaks soft)
4 Cups smooth Peanut Butter, In my most recent batch I added 1/2 cup of organic PB which gave great texture to the PB Balls
2 Tsp Vanilla
1/2 Tsp salt (less if your butter is salted)
3-4 Cups of Conf sugar
1 12-oz bag Semi Sweet Chocolate Chips (I get the Ghirardelli 60% Cocoa)
2-3 shavings of food grade paraffin wax

Cream together the peanut butter and the butter until everything is even and smooth, I find that you will get a few chunks if you heat it a little bit (about 20 secs) everything will soften and you’ll have a much easier time of mixing it.  Add 3 cups of confectioners sugar and mix in completely, if your dough is crumbly (and it will be) it’s ok add up to 1 cup more conf sugar depending on how sweet you want your PB Balls to be (I like 3 1/2 cups).  Add the vanilla to the crumby conf sugar, pb and butter mixture and knead it a little bit.  Your hands will be covered in the mix but it will all sort of magically come together (this can be done with a dough hook as well but try not to use the flat paddle as it will over-aerate things).  Stick this pb dough in the fridge to firm up.  After 3-5 hours in the fridge your dough should be firm.  Using a teaspoon scoop out bits of dough and roll them into balls (I suggest a line up of Christmas movies to watch, my favorites were always the stop-motion Rudolph the Reed Nosed Reindeer and A Walt Disney Christmas) .  If you want yours to be larger then do them larger (a small cookie scoop works well), I like them as single bite snacks. Put the balls back into the fridge once they have been shaped and leave them to sit overnight or for at least 4 hrs.

In a double boiler (I use a ceramic bowl set over a pan of water) melt the chocolate and the paraffin until it is smooth, takes about 5 minutes.  The chocolate will run off the spoon in a steady stream when it’s ready and will look a little bit thin.  Dip your cold PB balls into the melted chocolate using either a toothpick in the top of a fork (I’ve recently  been of the fork mindset, it’s better for the environment and its less work), shake them briefly (to remove excess chocolate) and then put them on waxed paper in a cool place to harden (takes about an hour).  And eat them.  Like popcorn.  For three days.  Then give the rest away as you realize you have eaten 5 doz peanut butter balls and there’s still 5 doz more left.  Nom.

Tide Mill Whole Chicken Soup

In my previous post, I mentioned my nasty-all-consming-really-gross head cold.  Honestly, it was just a cold, but I’m kind of whiny and the thing that I love most when I’m sick is soup, so I made some.  Chicken soup to be precise, with one small whole chicken from Tide Mill Organic Farm!  This was, by far, the best chicken soup I’ve ever eaten. [Editor’s Note: Agreed] And while, yes, it made my entire apartment smell divine, it also just hit the spot and made me feel better when I felt awful.

On my afternoon of staying home from work sick, I remembered a 2.5lb chicken in my freezer and the need to get it out of there (a very good choice on my part as the 2.5lb chicken was replaced by a 15.5lb turkey after Thanksgiving).  I pulled the chicken out and rifled around in the fridge, emerging victorious with parsnips, leeks, celery and carrots.  Such fortuitous finds (I hadn’t been to the grocery store in a bit; that I had any veggies in the fridge that were still good was a surprise!).

I threw my whole (frozen) chicken, 2 of the leeks cut into 4 inch lengths and rinsed, half stalks of celery, 3 crushed and peeled garlic cloves, split parsnips and lengths of carrot all into my trusty 6 qt Le Creuset Stock pot (I love this pot, BTW), covered the whole thing with water, and walked away.  In about half an hour, my apartment started to smell divine, even through my stuffed-up nose; I couldn’t wait for the soup to finish.  So here it is, a basic and delicious chicken soup.  And it will make you feel better if you aren’t feeling well.  I swear.

Kathy’s Homemade Whole Chicken Soup
Note: I didn’t add any starch to this soup with it’s initial making, but the second night I added rice and it was wonderful, so maybe try that if you want it to be more substantial and less brothy!  Alternatively, you can use premade broth and poach a couple of boneless skinless chicken breasts in it, then shred them to get the soup without the homemade stock.

For Soup Broth
1 small whole chicken (2-3lbs)
3 whole leeks rinsed and green ends trimmed, cut into 3 inch lengths
2 parsnips, ends cut off and cut into 3 inch lengths
3 cloves whole garlic smashed with a knife
2 whole carrots, ends trimmed and cut into 3 inch lengths
2-3 stalks celery, rinsed and cut into 3 inch lengths
water to cover (4 cups)

Add the chicken (sans gizzards) and all of your vegetables to a stock pot and cover in water.  Turn your burner on low-med and let the whole thing simmer for 1 – 1 1/2 hours.  Everything will smell amazing.  Remove the chicken from the broth to a cutting board to sit for a minute and cool.  Strain the broth from your pot into a bowl reserving both the liquid and the strained out solids, I love a metal mesh strainer for this, it can handle the heat and is super cheap!  Return your solids to the pot you initially had them in, leaving the broth in a clean pot.  Skin your chicken and remove whatever meat you want from the bird.  Add the skin and chicken carcass to the pot you put the strained out vegetable solids in, cover this with more water and let it come to another simmer.  You can reserve this broth for another soup later, or freeze it; it’s pretty great for that.

For the Soup
Meat from 1 small chicken, shredded or 2 chicken breasts (3 thighs) poached in broth and shredded
4 cups of broth
1/2 red pepper cut into 1/2 inch pieces
1/2 green pepper cut into 1/2 inch pieces
1/4 cup celery, cut into 1/4 inch pieces
2-3 carrots cut into 1/2 inch pieces
1 leek, rinsed/cleaned and cut into 1/2 rounds
2 garlic cloves, smashed and minced
1/2 cup rice or egg noodles (optional)
salt and pepper to taste

In a large pot, sauté the leeks, onions and garlic over medium heat until fragrant and soft (3-4 minutes).  Add the celery and carrots and sauté until soft (another 3-4 minutes).  Add the peppers and stir until soft (1-2 minutes).  Add the broth and chicken and let the whole thing come up to a simmer.  Add salt and pepper to taste and lower the heat to low and continue to simmer for another 15-20 minutes.  If you are adding the rice/noodles, do that now and let them cook through.  Serve this soup with a pat of butter on top and a big spoon.  It’s comforting and delicious for the cold and flu season; bring it to someone that’s sick.  They’ll appreciate it.  I swear.

Sunshine Squash Butter

I love winter squash.  I love all of it. And I love all the different ways you can eat it – baked, mashed, soup-ed, stuffed, and pureed into a thick and luscious spread known as Pumpkin Butter.  I know that Sunshine Squash isn’t a pumpkin at all, but it is a winter squash and pumpkins are winter squash.  Also people tend to know what something will taste like a little more if you say you made “pumpkin butter”, as opposed to “winter squash butter”. (Author’s Note: I was going to put an image of Winter Squash here but I didn’t like any of them, so here is Boyfriend’s Hallowe’en pumpkin instead)

I am a stress cook; well, sometimes I’m a stress cook.  I made this batch of [insert something cozy and sweet here] butter after a spectacularly bad day at work.  I was cooking to relax – chopping, peeling… it was soothing and exactly what I needed to do the evening I made this butter.  I also tackled granola and creme brulee that night.  The granola rocked but I overcooked the creme brulee (curses!).  I also don’t have a stellar amount of pictures here, because the actual night that I made the butter, I wasn’t photo-ing, just cooking to cook,which is something I simultaneously like and don’t like.  I need to form good cooking habits right now, with the top two being a) dishes while I cook, because they are always so sucky after and b) take pictures throughout, from start (raw ingredients) to finished product and serving.  These are both fairly tricky for me because I’m kind of lazy and messy. I tend to get my hands covered in flour/butter/squash; then I don’t want to touch my camera. Anyone know a helpful person willing to come take pics while I cook free-of-charge?

Anyway – the pumpkin butter was delicious and hit the spot on that night, when I needed something warm and sweet to offset the bitter taste of my work day.

Winter Squash Butter
Note: I made this with a Sunshine Squash because it’s what I had on hand, but any flavorful winter squash will do; Kabocha or Sugar Pumpkin would undoubtedly be lovely.  Also, the spices are in portions I like. If you want your butter to be more like pumpkin pie, add more clove and less cinnamon.  Also, you can just throw in some pumpkin pie spice in place of all the spices; just remember to punch it up with some extra cinnamon.

1 medium winter squash- cored, peeled, and chopped into 1/2 inch pieces
Apple Cider- get it as local and as fresh as possible, about 2 cups
1/4 tsp Ground Nutmeg
1/4 tsp Ground Cloves
1/2 tsp Ground Ginger
1 tsp Ground Cinnamon
1/2 cup dark amber Maple Syrup. Again local is better and if you can’t get real maple syrup, use 1/4 cup molasses

In a deep pot (or a dutch oven if you are lucky enough to have one) put the squash and just enough cider to come up to but not cover it.  Bring it to a simmer and cook until soft and falling apart (15-20 mins).  Remove the pot from the heat.  If you have an immersion/stick blender, use it to puree the squash apple mixture until it is smooth with no lumps.  If you don’t have an immersion blender, you can use a regular stand blender or a food processor; just do it in batches again until it’s smooth and even.  Return the squash puree to the heat and add the spices and syrup.  Stir everything well and bring it to a simmer.  Simmer the pot, uncovered if you dare (it gloops and splatters) for about twenty minutes.  The mixture will start to thicken and be spreadable when it’s ready.  And you’re done.  Serve it while warm on vanilla ice cream or cold on yogurt.  This is wonderful as a spread for breads too. Basically I love it, ALL THE TIME.  Actually I’m going to have some… right now.  Ta-Ta!