Baked Asparagus and Chickpeas

Spring has finally moved in and is rapidly approaching summer here in Boston and I am simultaneously thankful and irritated.  The thankfulness comes of knowledge of fresh and local produce that will soon be gracing my table and kitchen and the irriation comes of horrible spring hayfever.  I know we all have it on heavy pollen days – the runny nose and itchy eyes come with the territory, but just once I would like to smell the lilacs and not sneeze for the rest of my walk home.  But the produce – that I can get behind.  With the city’s seasonal farmer’s markets starting up I’m getting impatient for food that tastes fresh again.

On a recent trip to the Dewey Square Farmer’s Market I was thrilled to see Kimball Farm with bunches of asparagus for $5 each.  They were good and I was excited to be seeing produce that is creeping closer to home as the ground warms and green things start to explore the world.  With the fresh asparagus comes the hope of greater things coming soon – tomatoes that taste like tomatoes (gasp), peppers that I want to eat, and fresh herbs that I’ll add to some greens (which you can get at your market now thanks to cold frames and awesome farmers), add a squirt of lemon juice and call it dinner.  But we’re not quite there yet.  For now I have some root vegetables left over from the winter and this farm fresh asparagus – the first sign of summer actually coming to stay.

I love asparagus, especially the tender green shoots that are no bigger than a pencil and burst with a sweet and green flavor; it’s filling and delicious.  I basically turn BF and I into vegetarians while asparagus is in season, buying it in quantities that make most people look at me strangely, and gently roasting it with chickpeas at least twice a week.  I’m obsessed.  And it’s soooo worth it.  We aren’t vegtarian eaters usually – add a sausage or some chicken to our meals and we’re happy campers but this roasted asparagus dish is fantastic and when I made it the other night as a quick meal, BF asked me to make it again.  I was so surprised you could have knocked me down with a feather, a quick and easy meal that’s cheap and delicious – oh yeah I’ll make it again (and again and again).

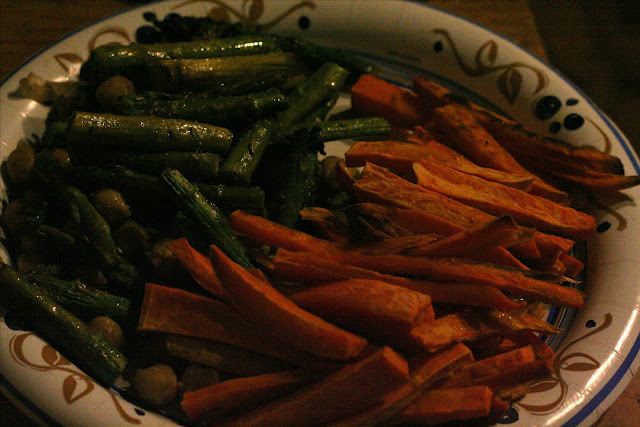
The best part of this “meal” if you want to call it that, is that it’s virtually effortless – remove the bottoms of the asparagus, cut it into finger lengths, and toss it with some oil and spices.  It’s a meal!  Veggies!  Protein!  I suppose you could do it as a side, but it’s delicious on it’s own.  I like it with sweet potato fries – which is a great way to use up the tail-end of those wintered-over potatoes that are hiding out anyway.

Baked Asparagus and Chickpeas
1 bunch asparagus, woody ends broken off and cut into 2 -3 inch pieces
1 can chickpeas, drained and rinsed
1 Tbs olive oil
1 Tbs balsamic vinegar
1/2 tsp coarse kosher salt (any coarse salt is fine here, it doesn’t need to be kosher)
1/2 tsp garlic powder, to taste (rosemary is nice here too, or whatever other spices you’re in the mood for)

Preheat the oven to 350 degrees farneheit.  Add the asparagus and chickpeas to a 2 inch deep baking dish (I use a 13×9 glass pan) and drizzle the olive oil and balsamic over them.  Gently toss the asparagus/chickpeas with the oil and balsamic (this can be done in a bowl if you are not confident of your abilities to keep them in the pan).  Add the salt and spices and give everything a final toss to evenly distribute the spices.  Stick the pan in the oven for 20-25 minutes until the asparagus is tender and a little wilty.  The asparagus will be fantasic and the chickpeas crisp up so much that you will  chase them around your plate until they’re gone.  I promise.  This makes a great entree meal for two (with sweet potato fries, of course) or as a side for more.  Deee-licious.

Marx Foods Citrus Juices and a Mocktail to make with them

I love seltzer water, especially when the weather is turning warm and my porch is cleared of the winter’s detritus.  There’s something so refreshing about sipping a lightly sparkling drink that is enhanced by a squeeze of fresh citrus juice and some ginger that I find sinful on Spring days when the sunset is lingering and the trees are bursting into life again.  This is a mocktail that I created for those evenings that linger when the kitchen is warm and you just want to sit on the porch and read.

A friend was recently up for a blogger challenge over on the Marx foods website, so I went to give him my support by clicking a button and then I was caught in a website FULL of fabulous gourmet goods that I hadn’t heard of.  I checked out the Marx blog and wandered over everything until I stumbled across a blogger offer – for juices.  Three of them – Yuzu Juice, Kabosu Juice, and Sudachi Juice.  They were all foreign to me and looked decadent in their squat brown bottles.  I emailed the PR guy (Justin) and asked for a sample – at worst I wouldn’t like them right?

I liked them, all three of the juices offered a variation on lime juice – fairly sour but with subtle undertones.  In my naivete I had assumed these juices would be palatable for sipping – they were not, unless you can sip lime juice or have a miracle berry.  But they were delicious, and offered a depth of flavor that plain lime juice lacks.

The Yuzu had a bright lime flavor with undertones of tangerine (oh yeah, i’m about to get all taster snobby here, it’s kinda fun and silly).  I want this juice in vinaigrettes on fruit salads.  The Kabosu juice seemed to be the sweetest of the three.  I like it for it’s lemony flavor with a fantastic aftertaste of cantaloupe – yeah cantaloupe, it had that honey melon flavor.  Totally Decadent.  There’s a reason this was the juice to grace my mocktail.  And then there was the Sudachi.  This was my least favorite of the three juices, it is very tart and I found it hard to separate any other flavors over the tartness.  Maybe in a simple syrup it would be better?  Maybe?  I felt like I was sucking on a lemon with some grapefruit juice thrown in there to taunt me with another flavor.  It lacked the depth of flavor that I found with the other two juices.

I suppose you could add a bit of your favorite vodka to this drink to make it more of an adult soda – but why would you tamper with a good thing?  And with no alcohol you can feel decadent without going overboard when you drink this on a hot saturday afternoon and read from your newest obsession.

Kathy’s Ginger-Kabosu Soda
Note:  I’ve been adding these juices to a lot of things where I would regularly add lime or lemon juice but this soda is my favorite, and garnished with the fine slices of kumquat and a shave of ginger these were dressed up from refreshing to classy enough to serve at a dinner party.

1 Thumb sized nub of ginger, peeled and thinly sliced into coins
1/3 cup sugar
1/3 cup water
6 oz Club Soda
2 oz Kabosu Juice (If you can’t use that Lime would work too)
Ice
1 Kumquat cut into rounds, for garnish (optional)

In a small saucepan bring the ginger coins, sugar and water to a boil.  Allow them to simmer gently until the sugar dissolves – 2 minutes, maybe.  Remove the pan from the heat.  Let the ginger steep in the sugar water fro at least 5 minutes – more time will make the ginger flavor stronger.  Strain the ginger out of the syrup when the ginger flavor has saturated the syrup enough.  Reserve this ginger for garnish.  Let the syrup cool.  In a pint glass, combine the ginger syrup, Kabosu juice and club soda.  Stir Gently.  Add ice if you like.  Garnish with slices of kumquat and some of the candied ginger from the syrup.  Enjoy while sitting on a deck in the sunshine, reading, or playing a video game.

I was given these juices to try and review for free by Marxfoods.com, but all opinions and comments are my own.

Passover Challenge: Flourless Chocolate Cake with Salted Caramel Sauce

A while ago twitter was all abuzz about a passover potluck and it sounded amazing.  I wanted in and immediately started to plan my Seder challenge meal with the salt of the plate by creating a Flourless Chocolate Cake with Salted Caramel Drizzle.  I immediately emailed Cara saying I was in and what I was bringing; she has a great description of the meaning of the Seder plate over on her blog if you want to learn more (after all, Knowledge is Power!).  I ended up (sadly) missing Cara’s Seder potluck, but I still made the cake because, regardless, we all need a little more chocolate in our lives, right?  Then I searched for my flourless chocolate cake recipe – which is sort of like trying to find a needle in a haystack (my loose recipes are about 6″ of stacked paper and in no semblance of order… someday I’ll work on that).

The recipe I wanted was a symphony to dark chocolate – a pound of chocolate, espresso, eggs, butter, and sugar in a single bowl mixed.  So Simple and So Delicious.  I love rich, dark, chocolate decadence but I can only take it in small portions so I make this cake once or twice a year, if I’m even motivated for that.  I have friends who can’t “do” gluten so I try to accomodate them, and most of the time succeed, which is how I came to hunt for this particular gem in the first place.  I know two people that should avoid the binder that we all know and love and it is with them in mind that I try to go “gluten free” occassionally here on the blog.

Now, this cake; the first time I made it was with a lovely raspberry coulis that was bright and tangy to cut the richness of the cake. This time I made a dark, intense caramel that married with the flavors of the cake in an entirely different way, making each bite more decadent than the last.  It’s quite a lot like eating a well-made candy bar, but without the hassle of having to bite on the chocolate; this cake just melts away, leaving you with an urge for a big glass of milk or some sharp and well-spiced tea.

Kathy’s Flourless Chocolate Cake with Salted Caramel Drizzle
Note: This cake is rich and dense; plan to eat small pieces of it at a time.  Having a sauce to drizzle over it makes it less intensely rich.  I also have a tendency to use the darkest chocolate I can find without it being unsweetened so if you used something less dark, it could be less rich.  Either way, it’s delicious in a celebratory way, and it’s surprisingly quick to mix but takes some time to cook.

Flourless Chocolate Cake
1 lb of semi-sweet chocolate, chopped into coarse hunks (I recommend at least 55% cocoa since this really needs the fat)
1/2 cup sugar
1 cup brown sugar
3/4 cup espresso
16 Tbs (2 sticks) butter, softened and cut into 1 Tbs pieces
2 Tbs cocoa powder
8 eggs
1 Tbs vanilla

Preheat your oven to 350 and grease a 9″ springform pan with butter. Line the bottom of the pan with parchment paper.  In the large bowl of a food processor, pulse your chocolate until it is a coarse crumb texture – this take about a minute.  Add the sugars and pulse until everything is an even, sandy texture.  Turn the food processor on and gently stream in the HOT espresso; this will melt the butter and allow the whole thing to come together.  Allow this to run for a couple of minutes to make sure it’s smooth and the chocolate is fully melted.  Add the cocoa powder, then the butter pieces one at a time to the running food processor.  Process until smooth and fully incorporated – about 30 seconds.  Add the vanilla.  Add the eggs one at a time, pulsing the FP between each egg to incorporate them fully.  Pour the mixture into the lined and greased springform pan.  Place the springform on a cookie sheet (in case of leakage) and bake for 50-60 mins.  The top of the cake will be puffy and a little cracked when it’s done; the center of the cake will still jiggle a bit.  Pull the cake from the oven and set it on a rack to cool for at least an hour – if you don’t allow this resting period and try to pull the springform off early you will have crumbs; they’ll be tasty crumbs, but they’ll just be crumbs. After the cake has set up, remove the outer ring of the springform pan.  You can level the cake now if you would like to, or if you are like me, you can not worry about that and flip it onto a plate and watch the middle make a crater.  If you do level the cake, you should probably flip it over so the pretty side is facing up.  Chill it overnight or for at least 3 hours in the fridge.  Serve chilled and drizzled with copious amounts of salted caramel sauce.

Salted Caramel Sauce
Adapted from Smitten Kitchen
Note: Mine is darker than hers, I liked the “nuttier” flavor of the darker sugar and I added a little corn syrup to keep the caramel from crytallizing.  Since I wouldn’t eat all the caramel for a bit I wanted to be able to reheat and use it at my leisure – a little corn syrup made that easier.  If you are hesitant about corn syrup, David Liebovitz talks about it over on his site and you can see more there, but for all intents and purposes it can be left out here if you feel it should be.

1 cup sugar
1 Tbs light corn syrup
6 Tbs high quality salted butter. I used Kerrygold and it was divine!
1/2 cup plus 2 Tbs of heavy cream at room temp; fresher is better if you can get it.

Add the sugar and corn syrup to a medium sized sauce pan and whisk them while they gently come to a simmer over medium heat. This takes about 5 mins, sometimes less if it’s humid out.  Cook the sugar to a dark copper color (it’s better to have a light bottomed pan here so you can see the sugar change colors).  Whatever you do: DONT LEAVE YOUR SUGAR UNATTENDED, it’s a little twit and will burn if you walk away for even 0.2 seconds.  Remove the melted caramelized sugar from the heat and add the butter all at once, immediately.  This will simultaneously melt the butter and cool down the caramel enough to add the cream without it all siezing on you.  Whisk the sugar/butter mixture until everything is evenly distributed.  Add the cream all at once. The caramel will foam; it’s okay, that’s why you used a largish pan (you did use a largish pan right?). Continue to whisk the sauce until it all comes together.  Serve it immediately over your rich, dark, flourless chocolate cake or take it to the darkest corner of your apartment and eat it with a spoon while calling it “my precious” and… wait sorry, that’s not right.  You should probably try to share.  Everyone will love it after-all.  This stores for 2 weeks or so in the fridge. If you refrigerate it and find the caramel too firm, you can microwave it for about 30 seconds to soften it up again.

Thai-Peanut and Black Bean Chili

I went to college in a minuscule town in Western Maine.  While school was in session it felt like there was a town of about 15k when school was not in session there were about 3000 people in the town.  My school was wonderful with small classes and professors who knew your first name it was the place you wanted to go after going to high school in an even smaller town, a stepping stone toward more.  But it was the town I was most enchanted with.  There was a cafe where I worked for a brief period, there were the brick structures of campus covered in English Ivy, there was the river I rode a giant blowup dinosaur named Lottie down one summer day – meandering slowly on it’s way somewhere I never went (Mexico, ME maybe?), and there was Soup For You.

In my senior year of college I took most of my classes on Tuesdays and Thursdays, in class until 4:15 or so on Thursday and then later that evening from 6-9.  So in that little interim period from 4-6 I always walked downtown to Soup For You, ordered one of the daily soups (there are always 6 – 3 vegetarian options and 3 omnivorous options) and a coffee and sat in a booth and read, or chatted with friends there.  It was one of my favorite semesters, and I always hoped for this soup to be on the menu, especially on warm spring days.

Maybe I loved Soup For You because it was charming – with hand painted tiles and quirky-ness everywhere, or because they knew that I loathed soup-spoons so always gave me one of the miniature ones they held behind the counter for little kids, but I think the biggest reason I loved it is that it was introduced to me by a community.  That community was full of some of the strongest women I’ve ever met, and I am still close with several of them now.  They were my coworkers in the Women’s and Gender Studies Center, a work study job that is by far the best job I’ve ever had.  We held potlucks together, went to lunch, stayed well past or scheduled times just to hang out, published a literary journal called Ripple that focused on women in writing, we wrote poetry and we read.  I associate this soup with those girls. 

My first day in the Women’s and Gender Studies Center saw me, terrified (as usual) meeting everyone and trooping around the grand (read 2 or 3 streets) downtown of our little college town when one of the girls piped up that there was Thai Peanut and Black Bean Chili and Soup for You and they probably still had Corn Muffins.  So we stopped.  We all ordered the same thing 8oz of the chili and a corn muffin, then we sat down.  The warm spring sunshine on our backs and excited about our upcoming events and the new issue of Ripple.  So this soup is camaraderie for me, it’s comfort somewhere new, and it’s friends and mentors.  It’s my history.  It’s also a Soup for You specialty and totally made the internet fail me.  So this is as close an approximation as I can get.  Eat it with friends and a corn muffin.

Soup For You inspired Thai-Peanut and Black Bean Chili
Note: I love this soup and would eat it every day if I could.  It’s also quite close to Soup For You’s version, which is so exciting to me, since I can’t find anything half as good in Boston.

Olive oil
1 Medium white onion, finely diced
1-2 cloves garlic, minced
1 Tbs Ginger Juice, or 2Tbs fresh grated ginger (I LOVE GINGER, you may not so go lighter on this if it’s not your flavor)
1/2 red pepper, finely diced
2-3 medium carrots, sliced thinly into coins
1 can full fat coconut milk
zest of 1 lime
zest of 1 lemon
2 cans of black beans, 1 drained and 1 with liquid
1/4-1/2 tsp red pepper flakes (use more, less, or none depending on the heat you like)
1/4 cup creamy peanut butter
1/2 cup dry roasted unsalted peanuts
handful of cilantro (optional)

In a large pot heat the olive oil over medium heat.  Add the onion, garlic, red pepper, carrot, and if you are using fresh ginger add that too and allow them to soften, stirring occasionally – this should take about 5 minutes.  Add the coconut milk and the zests and stir to combine.  Make sure you get everything in the pot evenly distributed throughout the coconut milk and allow the whole pot to come to a gentle simmer.  Add the black beans and red pepper flakes then allow the pot to come back up to a simmer, allow it to simmer like this for 10-15 mins.  Add the peanut butter and allow the chili to come to another simmer.  If you think your chili is a little thin you can add more peanut butter, but that is up to you, regardless stir the peanut butter in well – it s the star flavor here.  Add the dry roasted peanuts and let them cook for 10 minutes or so – you want them to be warm but still have crunch.  Serve the chili with a corn muffin on the side and a sprinkling of cilantro on top.  Don’t ever look back.  Its vegan and delicious.  Win.

Whipped Feta Dip and Pita Chips

So, about a month ago I got together with Megan and Amanda for an awesome and truly delicious Bake Date.  We ate croissants and pop tarts, drank hot cocoa, and played a ton of banana grams (if you haven’t played that game you really should, it’s super fun and lots of indignation will happen).  I also made some dips and  homemade pita chips to make our bake date not kill us with sugar.  At least that was the plan.  I made two dips actually but I’m only going to write about one of them – ever probably, number two was not good.

A while ago (after blogger brunch at Dorado Tacos actually) I ended up hitching a ride to Russos with Renee and we talked about whipped feta dips.  Batting ideas back and forth over the ways feta could be used to make a dip and which feta would be best for it.  She ended up making one with beets (which is a fabulous shade of pink and I totally need to make).  And I made one with roasted red peppers (unbeknownst to her, admittedly, but it was this conversation that inspired me to actually try it).  I chose roasted red peppers because in the handful of times I have gone to Sofra I have gotten this mezza as an appetizer and it makes me giddy, fresh pita chips and some of this dip and I’m set.  Give me a book and I’ll read, and munch, for a good long while (well until the dip is gone anyway).

The pita chips were merely an experiment to see if I could do it.  There was no recipe to go by, just an idea that if I was spending $2.50 per bag on pita chips wouldn’t it be better to make them myself?  I was right.  It was worth it.  They were delicious, and I was lucky I was able to save any pita chips and feta dip once BF tried them.  Both the chips and dip were so remarkably simple I’m surprised I hadn’t tried them sooner. Now I strongly recommend you try them too.

Kathy’s Pita Chips
Note: This recipe just deals with one “bag” of pitas but you can easily make more. It’s also a very fast process so don’t go wandering too far while the chips are baking.

2-3 pocket pitas, cut into triangles and separated (I get mine at Arax where they get fresh breads delivered daily but wherever you can find the pita go for it, Thomas’ is a decent nat’l brand)
olive oil
garlic, salt, rosemary, whatever you like… cinnamon and sugar would be very good

Preheat the oven to 425 degrees farenheit, make sure you let the oven come up to temperture – it is critical with these chips or else they’re wilty (trust me, I got impatient so I threw the pitas in the warming oven and was hugely disappointed in the results).  While the oven heats cut your pitas into good chip sizes, I recommend basically making a pizza with 8 slices so you have triangles… or an approximation of them.  layer the pita “chips” in a single layer on a parchment lined baking sheet and spray/brush/drizzle olive oil on the pitas.  I use a regular spray bottle I picked up at the grocery store for this and it gets the job done, it’s not nearly as good as having a Misto (hey family *nudgenudgewinkwink*) but it works in a pinch.  Sprinkle whatever spices you like on your chips, I like mine with salt, rosemary, and garlic powder but I think cinnamon and sugar would be awesome, though they wouldn’t go with the feta dip (maybe a slightly sweeter spiced cream cheese dip, like frosting, eh?).   Put the chips in the oven for 3-7minutes, checking them every minute or two for doneness.  DON’T WALK AWAY.  These go from done to burnt in literally 10 seconds, but are worth it.  When the chips are a nice light-medium brown pull them from the oven and let them cool on the pan, this should only take a couple minutes.  Then eat them with the following dip.  Unless you made the cinnamon-sugar ones, then you’re on your own 😛

Roasted Red-Pepper Feta Dip
Note:  I made this after eating it at Sofra.  It’s delicious.  If you don’t have a food processor get it, if only to make this dip, though I suppose it could be made in a blender.  If you were watching it.  Also, a note about feta – get it fresh, it tastes worlds better and is very easy to get in the Boston area – ANY middle eastern market will have it, I know of 4 places in Watertown that do.  Another feta note, I recommend using Bulgarian Sheep’s milk feta for this (it’s not as salty as the cow’s milk, maybe the brine is different?  Anyone know?) but if you can’t find that – rinse your cow’s milk feta to lose some of the saltiness, the second time I made this dip I used mostly cow’s milk and didn’t rinse which left me with overly salty dip which needed to be modified, a lot.

1/3-1/2 pound Bulgarian feta – this is more creamy than cows milk/domestic feta if you can get it.  It is the superior choice.
1-2 whole roasted red peppers, without skin and cored, in oil if you purchase them
1-2 Tbs Oil, from the peppers, or Olive oil
1-2 pieces of Roasted tomato, if you have them if not don’t worry but they lend great flavor
1/2 tsp garlic powder or 1 small clove fresh garlic, more if you want the garlic strong

Break the feta up into large-ish chunks (the size of a clove of garlic is good) and add them to the bowl of a food processor, incidentally I cannot recommend enough that you get a food processor – they are so wonderful from grated potatoes for latkes to this decadent dip they get the job down extraordinarily well.  Chop the roasted red pepper into 4-6 pieces enough so that the processor doesn’t hate you.  Add the pepper, roasted tomato, and garlic to the feta.  Turn the food processor on for 10-15 seconds, then check the consistency of the dip – is it stilla little chunky – whip it some more, is it still a little thick – add a bit of oil.  Add the oil in a slow drizzle while the food processor is on, much like making pesto, until the dip has reached the consistency you want – I like my dip a little stiff but soft enough to pick up with a pita chip, this is about 1 tbs – more if the feta is dry.  After mixing in the olive oil taste the dip – does it need salt, most likely no but if your feta is tangy it may, is it salty?  If you find your dip salty I was able to neutralize that fairly easily with some plain yogurt about 1/4 cup.  The important thing for this dip is that you keep trying it until the flavor is what you like, since you will be eating it and having to throw this sort of thing away is sad.  It will be orange, that’s ok it’s still delicious.  Eat it while, of course, playing Bananagrams with friends.