Cinnamon Sugar Pull-Apart Bread

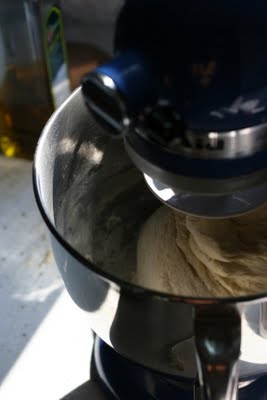
I love to bake yeast breads.  I find the smell of rising bread dough reminds me of being little and making dough with my mom on snowy days.  When we were growing up we always made the same bread – a standard white bread recipe that always made six loaves.  We would make the dough and I would stand on a chair to turn the handle of the dough kneader – a big steel bucket with a dough hook that we turned with a worn wooden handle.  Now when I make dough I use the dough hook attachment for my Kitchen Aid and it takes two or three minutes, it’s quick and does a great job – but I still kind of miss turning that big crank to watch the dough turn into a perfect ball.

This bread is not from the recipe I used as a child – it’s a sweet dough, so there’s sugar there and some spices too.  This is a recipe that Elly used in my high school baking class to teach students about yeast risen dough.  It’s rich in all the right ways and makes a perfect loaf of pull-apart bread.  I’ve mentioned Elly on here in passing a couple of times, she gave me the best recipe for Ginger Snaps I’ve ever tried and she is one of the reasons I still cook.  I remember her coming to school suppers and serving baked beans when I was little and staying until the very end of the meal – making sure everything was put away and the kitchen was spotless.  She was a woman who cooked because she loved to do it, not because it was a chore or something her family needed – sugar and butter were her lifeblood.

Every year when she showed her intro baking classes this recipe she talked about getting up at four in the morning to bake perfect cinnamon buns for her kids and husband because it was the best smell to wake up to.  She’s right, it is the best wake-up smell.  I make this bread every other month or so for BF and I, and even though I don’t get up at four in the morning to have the bread ready by 6:30 I understand her meaning.  That magical scent of cinnamon, sugar, and butter baking in the oven always makes me happy to be awake.  And I know I say this often – but there’s nothing more satisfying on a lazy weekend morning than kneading bread dough and playing with yeast.  It takes a bit of time to bake a yeast risen dough, but the payoff is totally worth it. I promise.

Cinnamon Sugar Pull-Apart Bread
Adapted from my introduction to baking cookbook where it is written in purple, sparkly pen.


For the Bread:
1 cup warm water
1 Tbs yeast
1/4 cup sugar
2 Tbs butter, melted
1 tsp vanilla
1 tsp salt
2 1/2-3 cups all-purpose flour
1 tsp cinnamon

For the filling:
4 Tbs butter, melted
1/4 cup sugar
2 Tbs cinnamon

Combine the water, yeast, sugar, and butter in the bowl of a stand mixer fitted with the dough hook attachment and allow the mixture to get a little frothy.
Stir in the vanilla and the salt.
Add 2 cups of flour and combine, on low, with the dough hook.  Continue to add flour in 1/4 cup increments until the dough comes together as a ball.
Continue to stir the dough with the dough hook for another two minutes.
Place the dough in a lightly oiled, large bowl covered in plastic wrap.  Put it somewhere warm to rise until doubled in volume, about an hour.
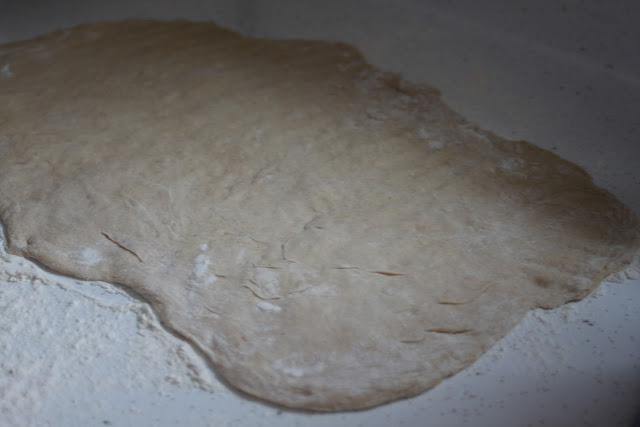
When the dough has risen dump it out onto a lightly floured surface and roll it out until it’s a rectangle about 9″x15″.
Lightly grease a loaf pan with butter.
Combine the melted butter, sugar, and cinnamon so they become a paste – I’ve spread the butter then used cinnamon sugar as well, but prefer the paste method.
Spread paste evenly over the rolled out dough.
Cut the dough into strips about 3″ wide.  Stack them on top of each other. There should be about five.
Cut the stack of dough strips into thirds.
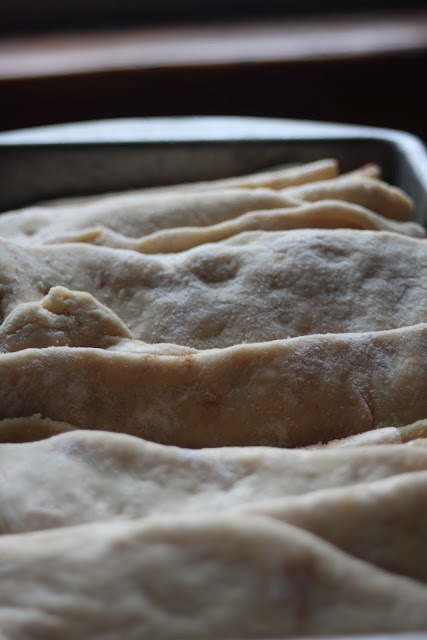
 Stack the cut dough in the loaf pan so that the cinnamon side of the dough is touching the non-cinnamon side.
Cover the pan with plastic wrap again and let it rise somewhere warm.
While your dough is rising, preheat the oven to 350 degrees.
When the loaf is ready, about 30 minutes later – it doesn’t need to double this time, we were just letting the flour relax a bit – pop it in your preheated oven.
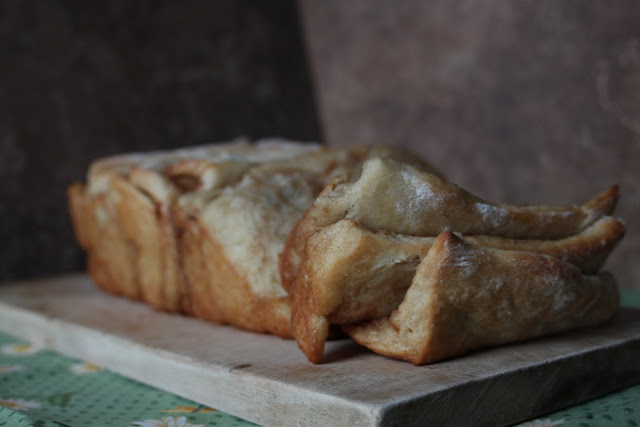
Bake the bread for 30-35 minutes, until it’s golden brown on the top.
Allow it to sit at room temperature for 5-10 minutes before eating.
This is ideal with a cup of coffee.
Share with a friend.

Six Layer Salted Caramel and Chocolate Truffle Cream Cake

Thanks for the picture Rachel!

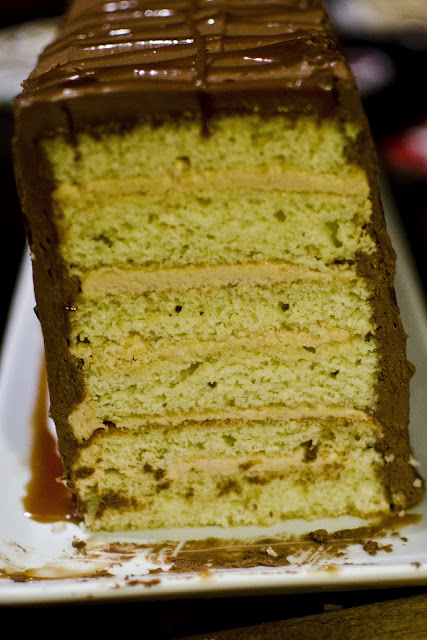
I wasn’t going to post this recipe initially.  The cake recipe is an old one (a favorite that I use all the time) and the salted caramel frosting is directly from another blog – but BF told me I needed to share it because a six layer confection of frosting and cake should be shared.  Because I hadn’t initially meant to blog this there are only pictures of the cake as it was built, but don’t worry about that.  Marvel at the cake – six layers of yellow cake, salted caramel frosting sandwiched between each layer, coated with decadent chocolate truffle cream frosting, and topped with drizzles of caramel sauce.

I had been playing with the idea for this cake for quite a while – it’s a take on Smith Island cake, which just had chocolate frosting and filling.  But BF isn’t the biggest fan of that much chocolate and I’ve been wanting to make salted caramel frosting, so it seemed a natural fit.  I made this cake to bring over to Rachel and Joel’s as a pairing with a fantastic meal of braised lamb shanks and potatoes au gratin.  Which meant I baked all day and left an obscene amount of dishes in the sink.  But it was worth it.

I am one of those people that will bake to soothe whatever stress I’m under, whether it be in relation to job-hunting or doing my taxes, baking calms me down.  So on Saturday, while BF struggled with his taxes and I paced impatiently from the kitchen to the office and back again, I baked a cake, I made two different kinds of frosting, and I fell in love with salted caramel sauce all over again.  As I watched sugar melt and boil to a beautiful amber color and hoped against hope that it would come out right this time I fell into a state of ease – I shook off the tension of the week and indulged in a cake scrap drizzled with caramel sauce.  So perfect, so confidence inducing, so satisfying to see a pot of caramel and say, “yeah, I did that, TWICE.”

Let us not forget the chocolate truffle frosting, either.  This frosting is sort of a mantra for my mom who tells me that it is THE chocolate frosting I must make if I’m looking for it.  My mom found this frosting about nine-and-a-half years ago, while she was pregnant with ‘Tonio and swore she wouldn’t ever make another one.  I tend to agree with her – it’s fantastic, decadent without being too sweet, and rich without being overpowering.  It paired perfectly with the salted caramel frosting.  Now if only we all had enough room to eat a whole 3″x14″ six layer cake, instead we all had thin slices and cursed the epic amount of cake I made.  Oops.

Six Layer Cake with Salted Caramel frosting and Chocolate Truffle Cream Frosting
The cake is all my design!  The cake recipe I used is one I put up here a long time ago.  The salted caramel frosting is from this post, over on My Baking Addiction, I made just the caramel sauce to put on top too.

Chocolate Truffle Cream Frosting
Adapted from the Joy of Cooking
This recipe makes enough to frost and fill a two layer cake.

4 egg yolks
1/4 cup sugar
1 tsp espresso (1 tsp espresso powder + 1 tsp boiling water works)
1/3 cup boiling water
6 oz finely chopped chocolate (about a cup)
8 Tbs unsalted butter

In a wide heat-proof bowl (I use a shallow metal bowl) whisk together the yolks, sugar and espresso until fully combined and frothy, about 30 seconds.  Add the boiling water 1-2 Tbs at a time, whisking between additions, until fully incorporated.  Place a bowl in a frying pan with at least an inch of water in it (the idea here is basically a wide flat double boiler).  Bring the egg, sugar, espresso, water mixture to a temperature of 160 degrees, stirring occasionally, and remove it from the heat.  Add the chocolate and butter, mix until smooth.  If you find that the chocolate/butter aren’t melting you can put them back in the pan with water in it (turned off, the water should still be warm enough to melt chocolate).  Allow the frosting to cool, in the fridge, fro about twenty minutes if you want to use it as a spreadable frosting.  Or just pour it over your cake if you just want a glaze.  Enjoy.

Assembly


This cake was a bit tricky for me, in that I created the whole thing specifically for a platter I had in mind, hence it’s Kit-Kat like appearance.  This meant cooking the cake in cookie sheets/jelly roll pans and then cutting each sheet of cake down to a specific size, in this case 3″x14″.  I found that cutting the cake down to be uniform sizes was the hardest part, mostly because I just can’t cut in a straight line.  Regardless, when all of your cake pieces are uniform (or you think they are) stack them to make sure.  Then you can start the real assembly.  It’s best to have both frostings all ready when assembling, then you don’t have to stop.  Start with a cake on the bottom then add a hefty amount of caramel frosting – I found that one recipe made just enough for me to fill between the layers. Smooth out the frosting then add another layer of cake, continue to alternate until it looks like the “image” below:

Cake
Caramel Frosting
Cake
Caramel Frosting
Cake
Caramel Frosting
Cake
Caramel frosting
Cake
Caramel frosting
Cake
There should be cake on the top and bottom of the whole thing.  After you have filled the cake go around the edges with an offset spatula (if you have one, I used a butter knife).  Then coat the whole cake in chocolate frosting. If you made the above frosting (which I can’t recommend highly enough) then you should have enough for about 1/8inch think frosting over the whole cake.  You should check out Test Kitchen for tips on cake frosting, they’re awesome.  Last of all, top the whole cake with a drizzle of caramel sauce in whatever pattern you want.  Adding this caramel helps tone down the richness of everything else and is an important step, don’t skip it.  Then take this massive cake and share it, with at least ten other friends.  You will want to eat it all by yourself, this is a bad idea.  Also, taking it on a long, packed train/bus ride is not a good idea.  Trust me, I tried it, the cake got, well, smooshed.

Honeyed Nectarine Oatmeal Pancakes

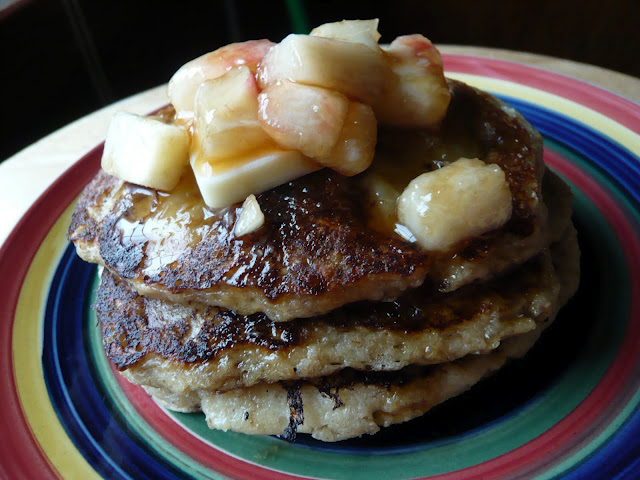
Sometimes you need to make delicious food on a rainy Sunday morning, it’s something that makes all gloomy days brighter.  I love these pancakes on any weekend morning, they are nutty and wonderful with a flavor that is only enhanced by the addition of nectarines and a cup of delicious coffee.  I don’t make these often, and usually save them for a special occasion when someone who leans toward gluten-free food is coming to my apartment for brunch, but when I do make them there are very rarely leftovers.

Specifically, I made these pancakes over Easter weekend when BF’s parents were visiting.  His dad was bowled over, I’ve been getting a weekly email for this recipe to be posted since.  There are various reasons this post didn’t go up earlier, bad pictures being the big one but also a lack of oats in my house as a contributing factor.  But, when there were finally oats in my house (again) and time was on my side I made these gems but, of course, I modified them to be better than the ones I had been making.  I added nectarines.  I would have added peaches but when I went to Russo’s the peaches were unripe and hard as rocks, so I grabbed white nectarines which were fragrant and perfectly ripe.
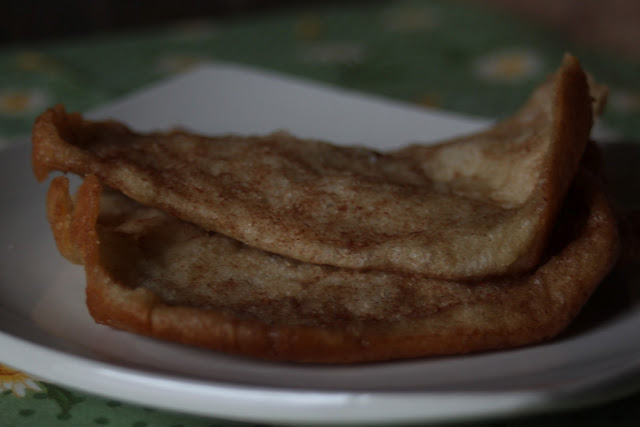
I made these pancakes thinking there would be leftovers for a “later-in-the-day” snack, what a fool I was.  When topped with nectarine infused maple syrup BF couldn’t stop eating them, and I liked them spread with a bit of butter and rolled up like a crepe.  The nuttiness of the oats really enhances the whole pancake, please use the oat flour – you really won’t regret it, the pancakes are still light and fluffy even in their gluten-free state.  Yes, you have to prepare for these pancakes, but it’s totally worth it.  After sitting overnight in buttermilk the oats break apart and offer a tenderness that absorbs the honey making them not to sweet and decadent without actually being decadent.  Make these for a friend, they’ll love you for it.
Honeyed Nectarine Oatmeal Pancakes
Adapted from The Inn at Fordhook Farm via Orangette
Note: I make these pancakes entirely gluten-free by using oat flour and I like them better that way.  I also use honey instead of refined sugar since I feel like it really brings out the flavor in the oatmeal.  I laid thin slices of nectarine on top of these pancakes but next time I make these with a stone fruit I’ll probably just chop the fruit and add it to the batter.
2 cups Buttermilk
2 cups Old Fashioned Oats
1/2 cup Oat Flour
2 Tbs Honey
1 tsp Baking Powder
1 tsp Baking Soda
1/2 tsp Salt
2 large Eggs
1/2 cup Butter, melted and cooled
1 Nectarine, peeled and chopped into 1/2 inch cubes
The Night Before:
Combine the buttermilk and oats in a medium sized mixing bowl, stir, cover with plastic wrap, and refrigerate overnight.
The Next Morning:
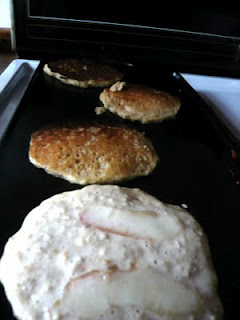
Remove the buttermilk and oats from the fridge and set it aside.  In a second bowl whisk together the oat flour, baking soda, baking powder and salt.  Add the honey, eggs, and melted butter to the oats and buttermilk mixture, mix until fully combined.  Add the dry ingredients to the liquids and stir until fully combined.  Fold in the nectarine pieces.  The batter will be thick.  Warm a skillet/griddle to a medium-high heat and brush/spray it with vegetable oil.  Drop the batter onto the griddle by scant 1/4 cup fulls onto the pan.  Cook the pancakes until bubbles start to form on the edges and the underside is lightly browned.  Flip the pancakes and cook the second side until it is browned.  Repeat, until all the batter is gone.  This makes 12-15 pancakes.  And they are delicious.  Serve the pancakes warm, with real maple syrup (I chopped a second nectarine and added it to my maple syrup, it was amazing).  You will definitely not be sorry for the time these took.  I promise.

Rosemary and Olive-Oil Focaccia

Have you ever planned a perfect meal and gotten all of the ingredients only to realize at the last minute that you forgot something crucial?  Have you ever decided to forgo your whole meal because you forgot that thing, or worse go without?  I have.  And everytime I feel that way I yearn for the thing I had planned for.  This happened to me recently with a darling friend when she came to Boston for a day of cooking, visiting, and drinking (we made the most magnificaent mimosas which I will share soon).  As we wandered through H-Mart looking at quirky and adorable bowls and spoons I offhandedly mentioned my lack of eating much tofu in my life.  My formerly vegan friend immediately demanded we get tofu, coat it in nutritional yeast and make sandwiches with it.  I said fine and she went on a tofu and nutritional yeast hunt.  Do you know how hard it is to find nutrional yeast?  The only place I found it was Whole Foods on River St, seriously, why so anti-vegan?

We arrived home laden with bags of H-Mart shopping, China Fair (a kitchen supply store in Newton) shopping, and some groceries from Star Market.  But we had forgotten bread for our sandwiches.  We cursed our lack of wherewithal and I said that I would make some, since I had all the ingredients and I do so love to make bread.  Also we were done with the being out part of the day and just wanted to cook and in general make a big kitchen mess.

I pulled out my Flour cookbook and turned immediately to the Rosemary and Olive-Oil Focaccia recipe.  I bought this book at the end of April and I have already made this focaccia dough a handful of times (like 4) for pizza.  It is the perfect recipe for pizza dough with its soft airiness, and as a foccacia it was DREAMY.  I loved sandwiches on it, good thing too as I wasn’t such a fan of the nutritional yeast coated tofu (sorry, S – maybe if we had fried it up in some butter I would have liked it more).  We made our sandwiches with tofu and there was still half a loaf of bread, ooh excitement.  I saved it, squirrelled away in a big ziploc in the pantry and the next day made the most heavenly prosciutto sandwiches on that bread.  Who knew?

Please take the time to make this dough – you won’t be sorry and your dining companions will thank you.  Focaccia is a nice way to “swank” up those humdrum sandwiches you’ve been carting to work and it’s totally flexible; next time I’m going to stud it with sundried tomatoes and top it with some fresh grated asiago.  Swoon.

Rosemary and Olive Oil Focaccia
Barely adapted from the Flour cookbook by Joanne Chang, it’s practically perfect as is, and mine wouldn’t be at all adapted if I kept bread flour around.

1 3/4 cup warm water (about 110 degrees)
1 tsp active dry yeast
3 1/2 cup All Purpose flour
1 1/4 cup bread flour (this is my only modification, I don’t keep bread flour around so I used AP, it was wonderful)
3 tsp kosher salt
2 Tbs sugar
3/4 cup olive oil
Cornmeal
2 Tbs Rosemary, roughly chopped

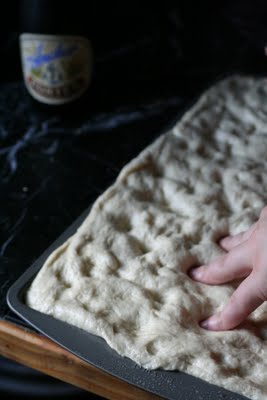
Combine the water and yeast together and allow the yeast to get foamy (about a minute of sitting).  If your yeast does not foam and just sits at the bottom of the water try again with slightly warmer water, if your yest still isn’t foamy it’s dead and you need new.  Once your yeast is activated and happy pour it into the bowl of a stand mixer fitted with the dough hook.  Add the flours (if you are using both, if not then just use 4 3/4 cup of AP flour), 1 tsp of the salt, and sugar and turn the mixer on low, allowing the dough hook to bring the whole thing together.  When the dough is a shaggy ball drizzle 1/2 cup of the olive oil into the bowl.  Continue to knead the dough until it is a smooth ball – 4-5 minutes on a low speed.  When the dough is smooth and supple turn the dough ball into an oiled smooth bowl.  Cover the bowl with a lightly oiled piece of plastic wrap and let it rise somewhere war (70-80 degrees) until doubled in volume.  Once the dough is risen you can do two things with it: either, split it in half and make two pizzas (NOMNOM) or make focaccia bread.  To make the focaccia bread turn out the dough onto a 10″x15″ cookie sheet spread with cornmeal.  Stretch the dough until it fills the cookie sheet and pock mark it with your fingertips.  Brush the top of the focaccia dough with the 1/4 cup of olive oil and sprinkle the salt and rosemary on top.  Bake the focaccia at 425 degrees farenheit for 30-40 minutes, until golden brown and puffed.  Eat this focaccia as sandwich bread, it’s one of the best things you will ever do.

Pomegranate – Lime Chicken

I love roast chicken.  It’s simple and requires minimal effort.  So I try to remember that and roast them occassionally.  This want to roast chickens is encouraged by my mom who manages to give me at least one bird everytime I see her, to be fair she has connections that leave me with a mighty tasty and local bird.

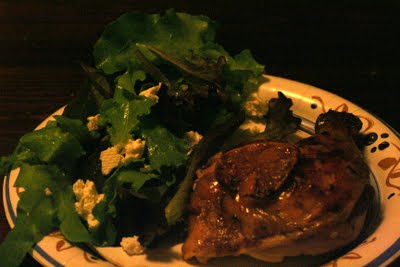
This is an especially simplistic chicken to cook and I love the method of cutting it down the breastbone and splaying it open.  I won’t lie I was entertained by this method simply becasue I learned of it as spatchcocking the chicken and it was a phrase that amused me greatly.  There’s something very fantastic and decadent about this chicken – but it’s neither, I didn’t even rub butter on this little bird before roasting it!  I roasted this chicken because a: I had it and it needed to be used up and b: I had a LOT of POMwonderful juice in my fridge (not that I’m complaining, that stuff is delicious).  I loved it.  BF loved it; which is an accomplishment as he so rarely likes chicken and, in general, thinks it’s boring.  This was a great mid week dinner paired with a simple side salad – seriously the simplest, some fresh greens (from Kimball Farms, keepin’ it local here) with vinaigrette on it.  But it felt decadent.

Since there’s only BF and I our meals are typically very small with few leftovers (well I aim for that, most of the time) and roasting a whole chicken always leaves the “but what about the leftovers” question dangling; but a pomegrante glazed chicken was just too tempting an idea to pass up.  We probably would have sipped the pan juices if we’d had the space after the actual food, they were that good.  And the leftovers made a fantastic chicken salad the next evening.

Pomegrante-Lime Roast Chicken
Note:  This is an entirely original recipe from ME!  But I encourage you to make it for yourself, maybe with lemon, or some thyme.

1-8oz bottle POMwonderful, pomegranate juice
1 Lime, cut in half
1/2 tsp coarse kosher salt
1- 4-5 lb roasting chicken, gizzards removed and cut down the breatbone

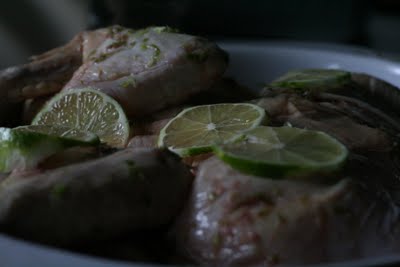
Preheat the oven to 350 degrees.  In a roasting pan, I like the oval ceramic dish I have from Ikea but anything that’s about 2″ deep and will hold your spatchcocked chicken will work a 13″x9″ pan should do it, splay your chicken out rib side down, so all the skin is facing up.  Rub the chicken all over the skin with 1/2 of the lime, making sure to squeeze all the juice out onto the bird.  Cut the second half of the lime into rounds that look like wheels (see my picture) about 1/4″ thick and place them all over the bird.  Pour the pomegranate juice on the chicken evenly making sure to coat everything with the juice.  Sprinkle the whole thing with salt.  Roast for 20-25 minutes per pound until the juices run clear, basting once about half way through with the pan juices.  When it’s fully cooked the chicken will smell delicious and doesn’t need any work, aside from eating.  Serve with the pan juices and a side salad of greens you got at the farmer’s market.